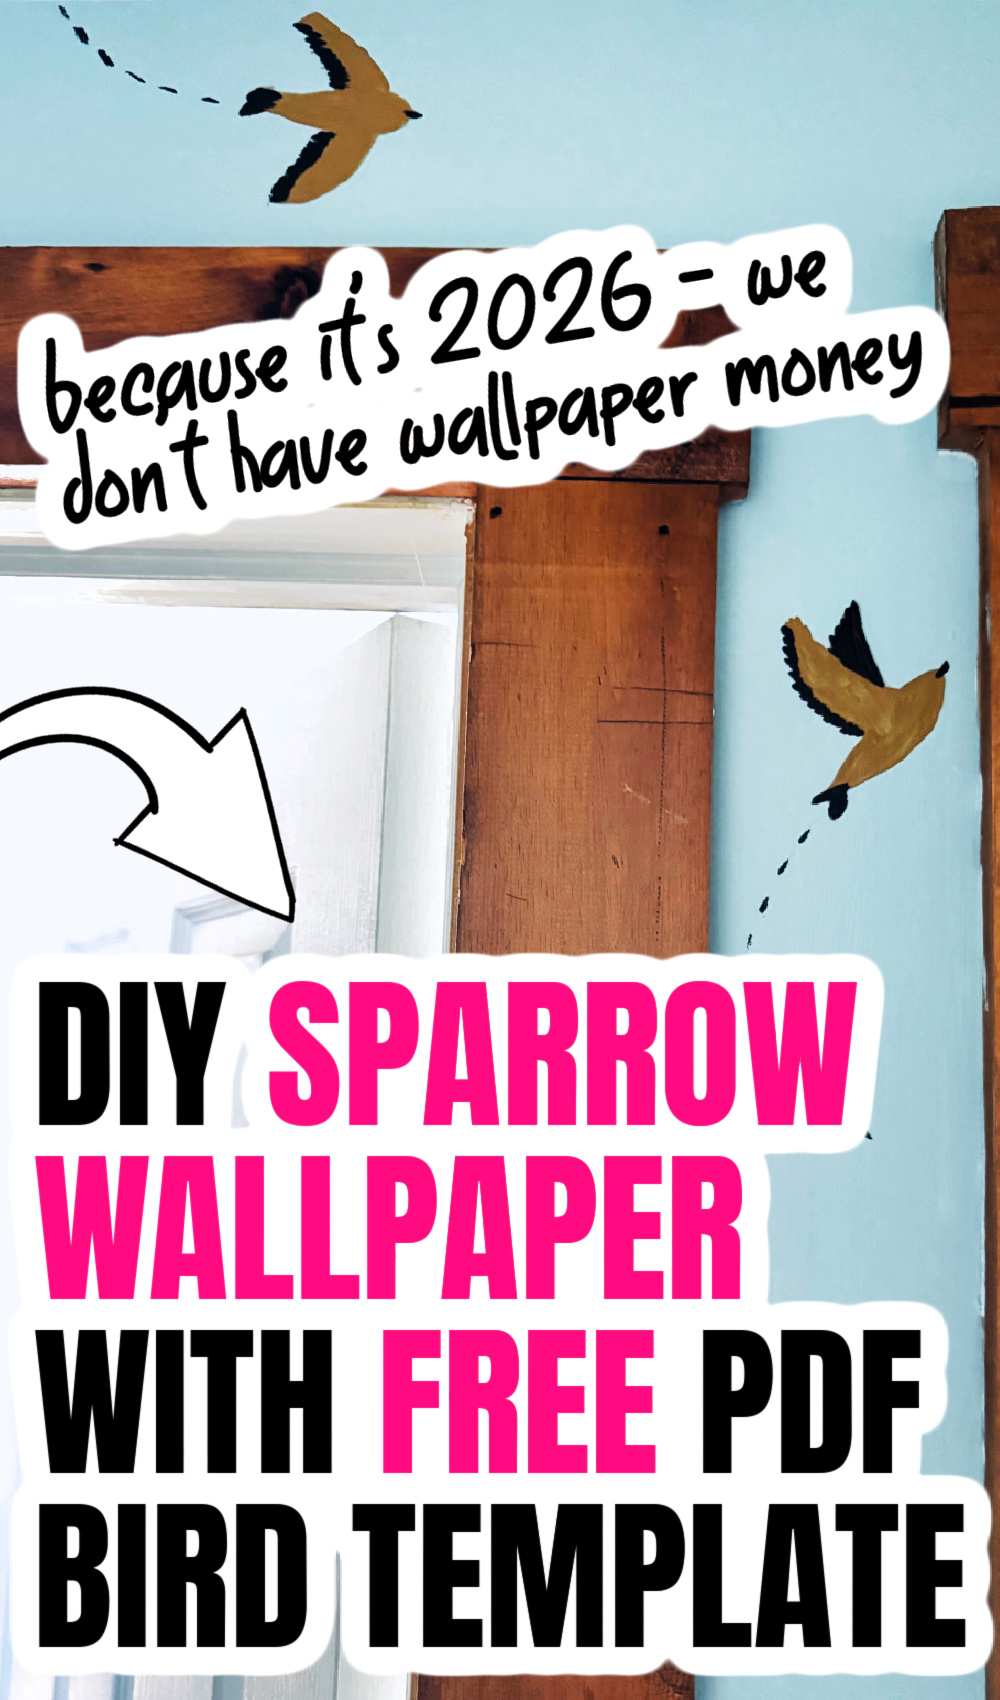
Inside: You don’t have wallpaper money, either? Join the club, and try hand-painting this DIY sparrow wallpaper, instead. Snag the FREE sparrow template to get started.
I’ve been contemplating how to decorate a dark hallway in our home for a while now. I knew I didn’t want to use any art on the walls, so I started browsing wallpapers…
And HOLY MOLY, wallpaper will take all your dollars, and I mean every last one of ’em. I simply couldn’t justify the cost (homeschool mom + five kids + I don’t have Boomer money = no wallpaper for me).
Plus, one wall of the hallway has several doorways and would be super tricky to wallpaper, so I kept scrolling Instagram to get more ideas.
Finally, I saw it: an awesome creator hand painted sparrows on her wall (link below), mimicking a popular wallpaper I adore. I was instantly in love. I knew I had to try it! Buuuut I also didn’t love her complicated method, so I came up with my own.
While I have mixed feelings about the base color I chose, I absolutely adore the sparrows themselves. Plus, it was a super fun project to do. Art can be therapeutic, after all, and my goodness, do we need therapeutic activities in 2026.
If you want to give this DIY wallpaper a try, you can find a free PDF template with the two bird styles I used at the bottom of this post.
DIY Sparrow Wallpaper (with Free PDF Bird Template)
THIS POST PROBABLY CONTAINS AFFILIATE LINKS. AS AN AMAZON ASSOCIATE, I EARN FROM QUALIFYING PURCHASES. YOU CAN READ OUR FULL DISCLOSURE POLICY HERE.
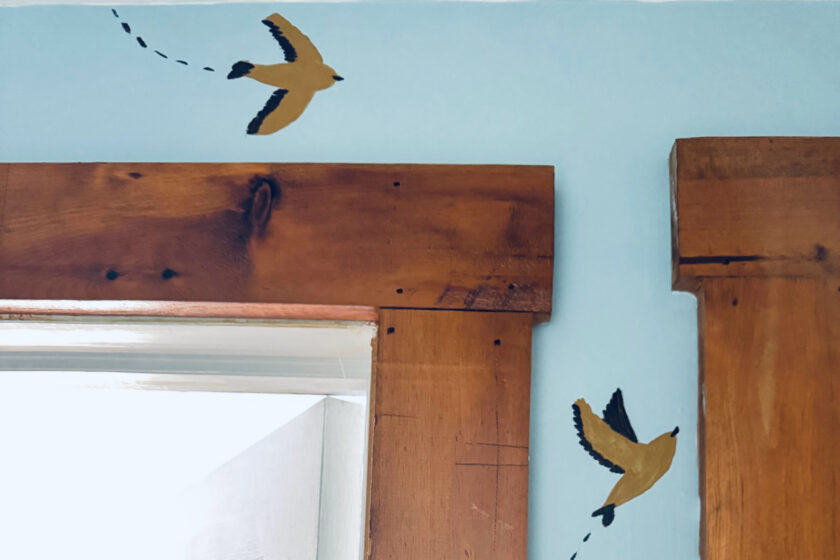
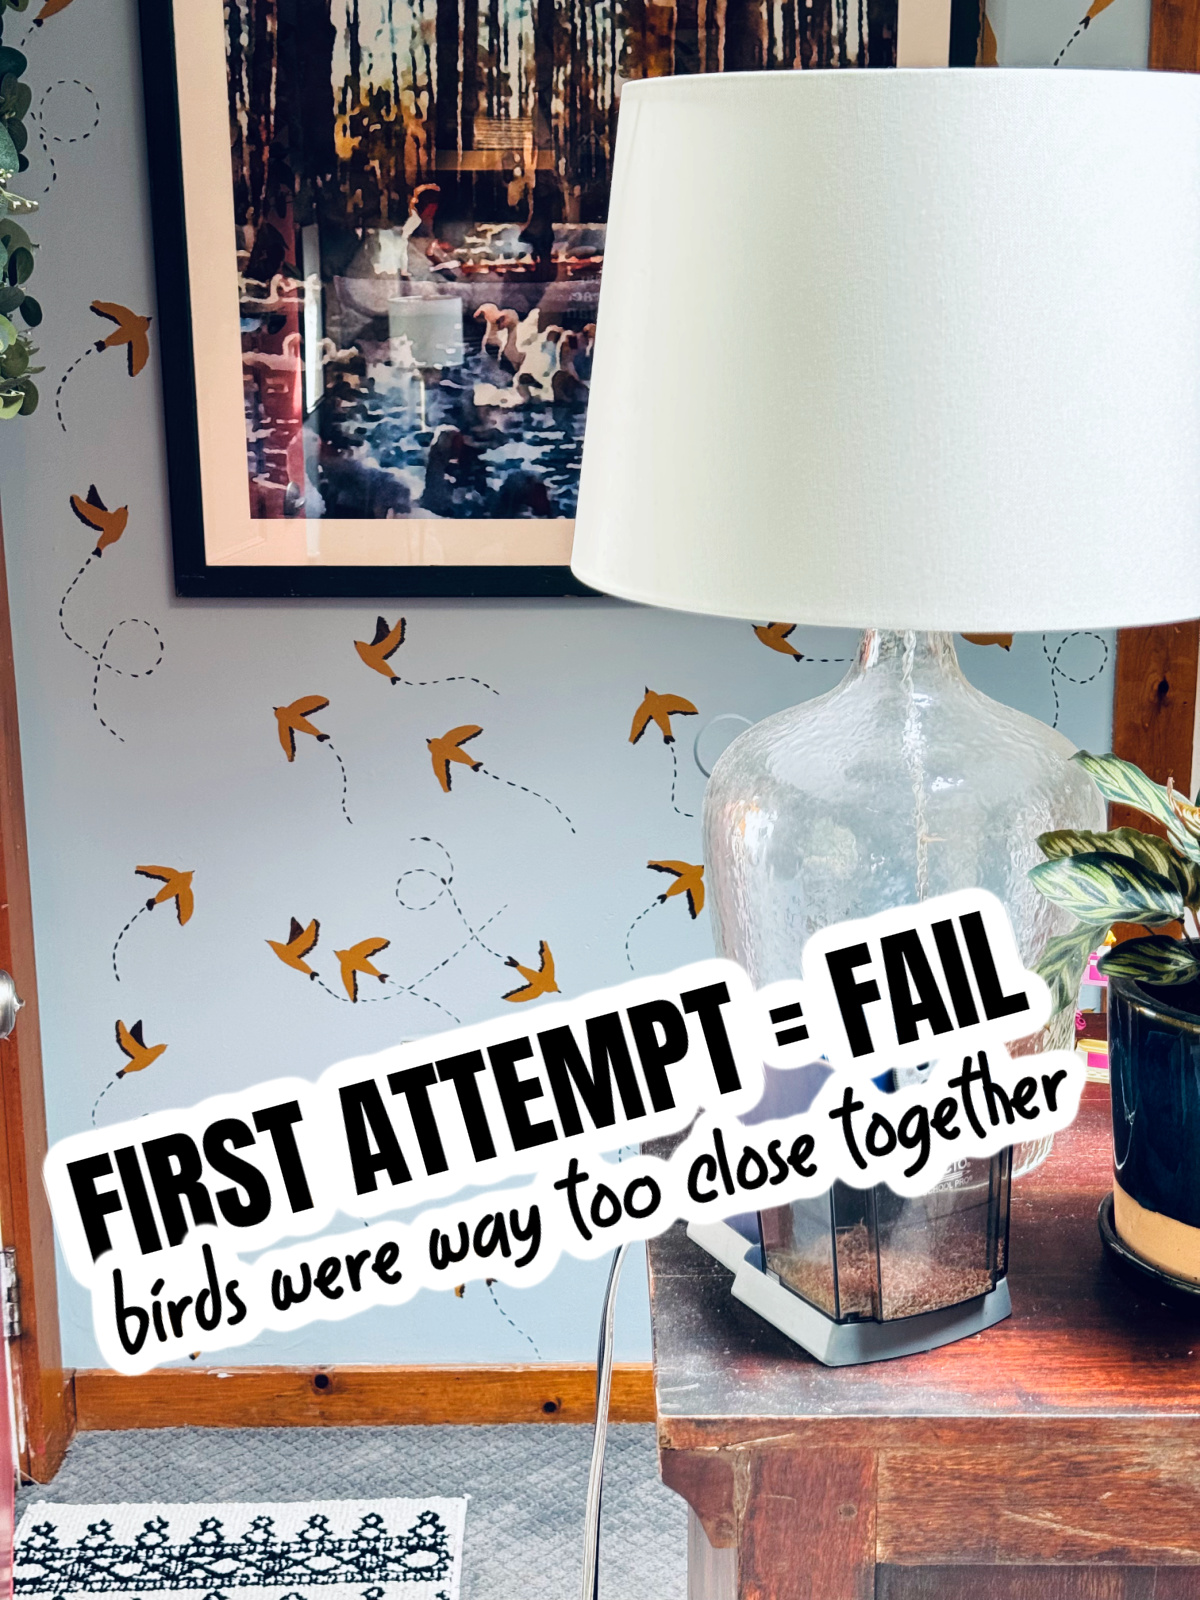
To be completely up front: my first attempt didn’t go very well (see second photo above). I originally thought I might carry the DIY wallpaper over to a living room wall as well, and NOPE nope nope.
First of all, I put the birds too close together, and the visual clutter was overwhelming for me. And the base color on that wall made me feel super uneasy (maybe I had a bad childhood memory in a room with that color?).
Needless to say, that wall will be painted over with primer and fresh paint as soon as I can get around to it.
You can find the video of the creator who inspired me HERE.
What You Will Need for This DIY Sparrow Wallpaper
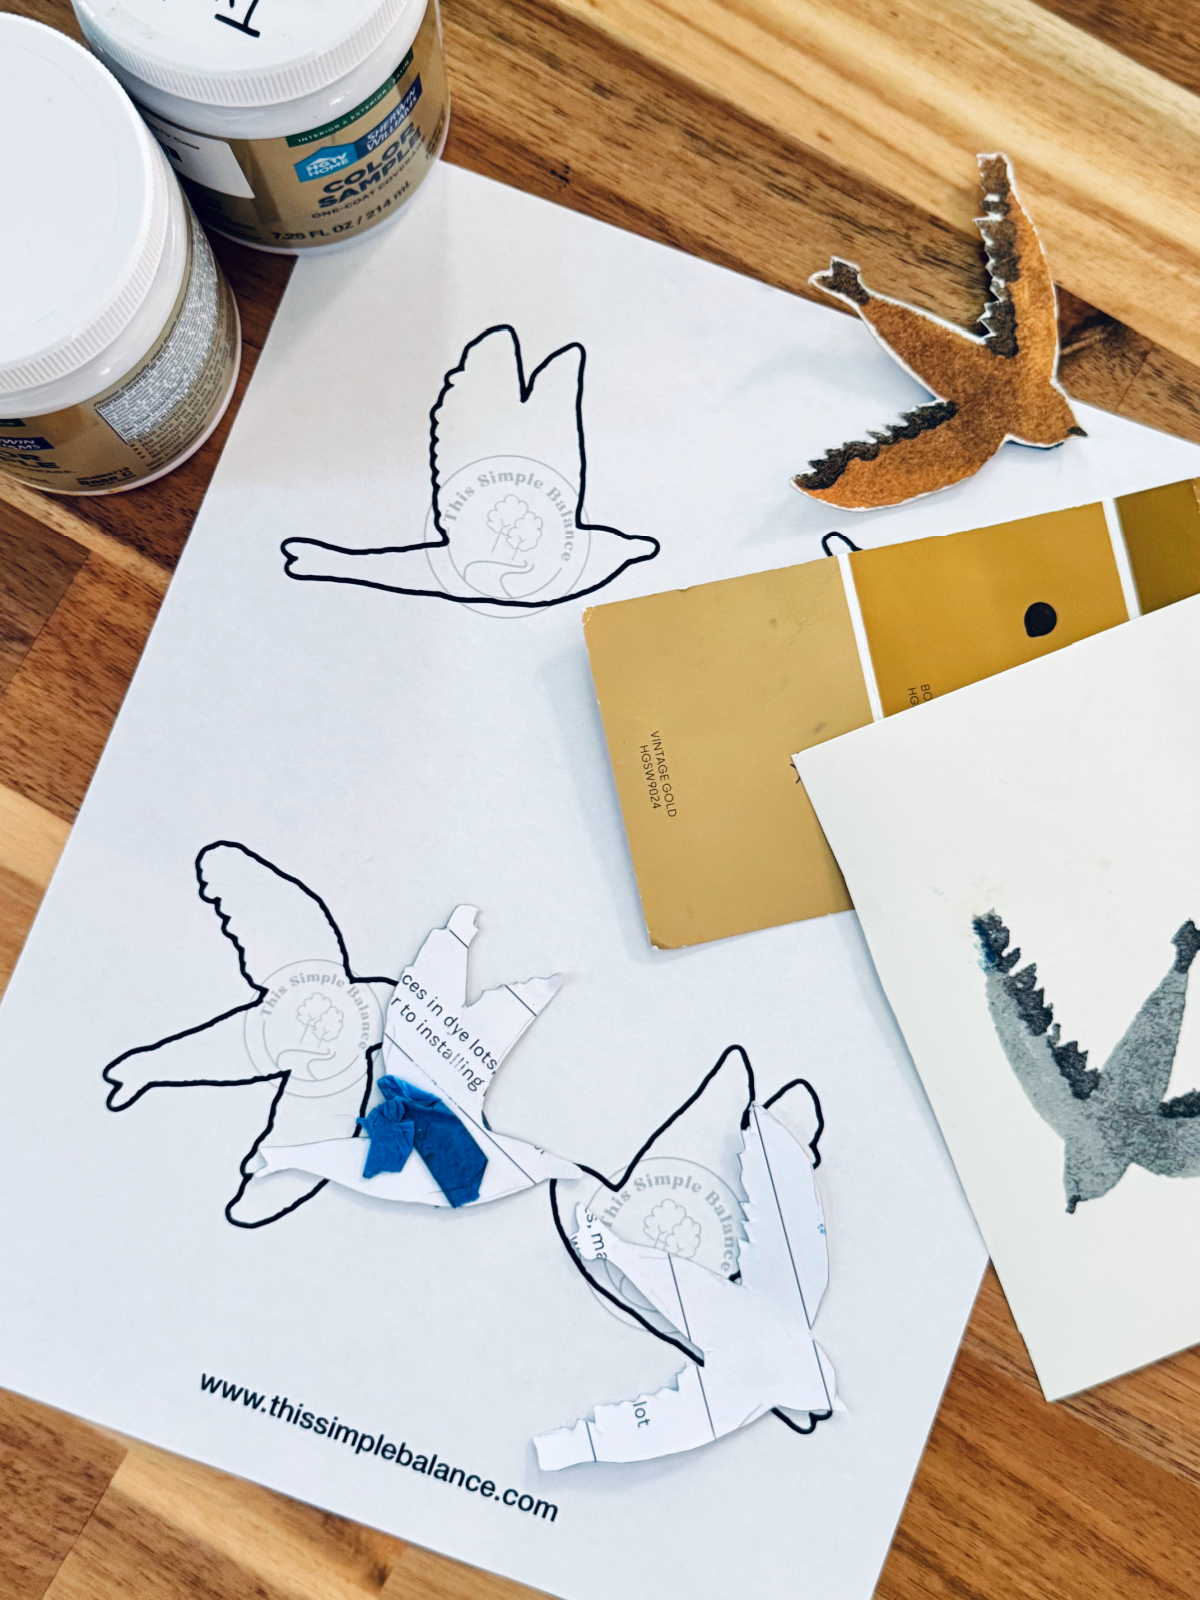
Here are the supplies you’ll need for this project.
- Sample Pot: Bird Base Coat Paint Color
- Sample Pot: Bird Accent Color
- Small Paint Brush Kit (this one works)
- Painter’s Tape
- Pencil
- Cut Outs from Free PDF Bird Stencil
If you need to paint the base color first…
- Drop Cloths (unless you like living on the edge)
- Paint Roller
- Paint Tray
- Base Coat Paint Color (Full Gallon or Half from a Different Project)
Now on to the steps I used to finish the hallway with proper bird spacing…
1. If desired, paint the wall your base color. I recommend a very light blue or white/cream.
If you’re happy with the existing color, you can skip this step. But if you want it to look more like wallpaper, choose a base color. If I could go back, I probably would have gone with a white or cream, like in the inspiration Lulu and Georgia wallpaper by Rylee & Cru.
If I could come up with a way to easily redo, I would, but painting around all those birds, even with the spacing I used…it would be really tedious. But if I’m bored this winter, I might have to attempt it. Except my family loves the color. Argh.
Anyway, paint the wall in your base color. Use two coats if necessary.
2. Use painter’s tape to plan your bird spacing.
The original creator created a large stencil and used the same pattern over and over. Me? I winged it.
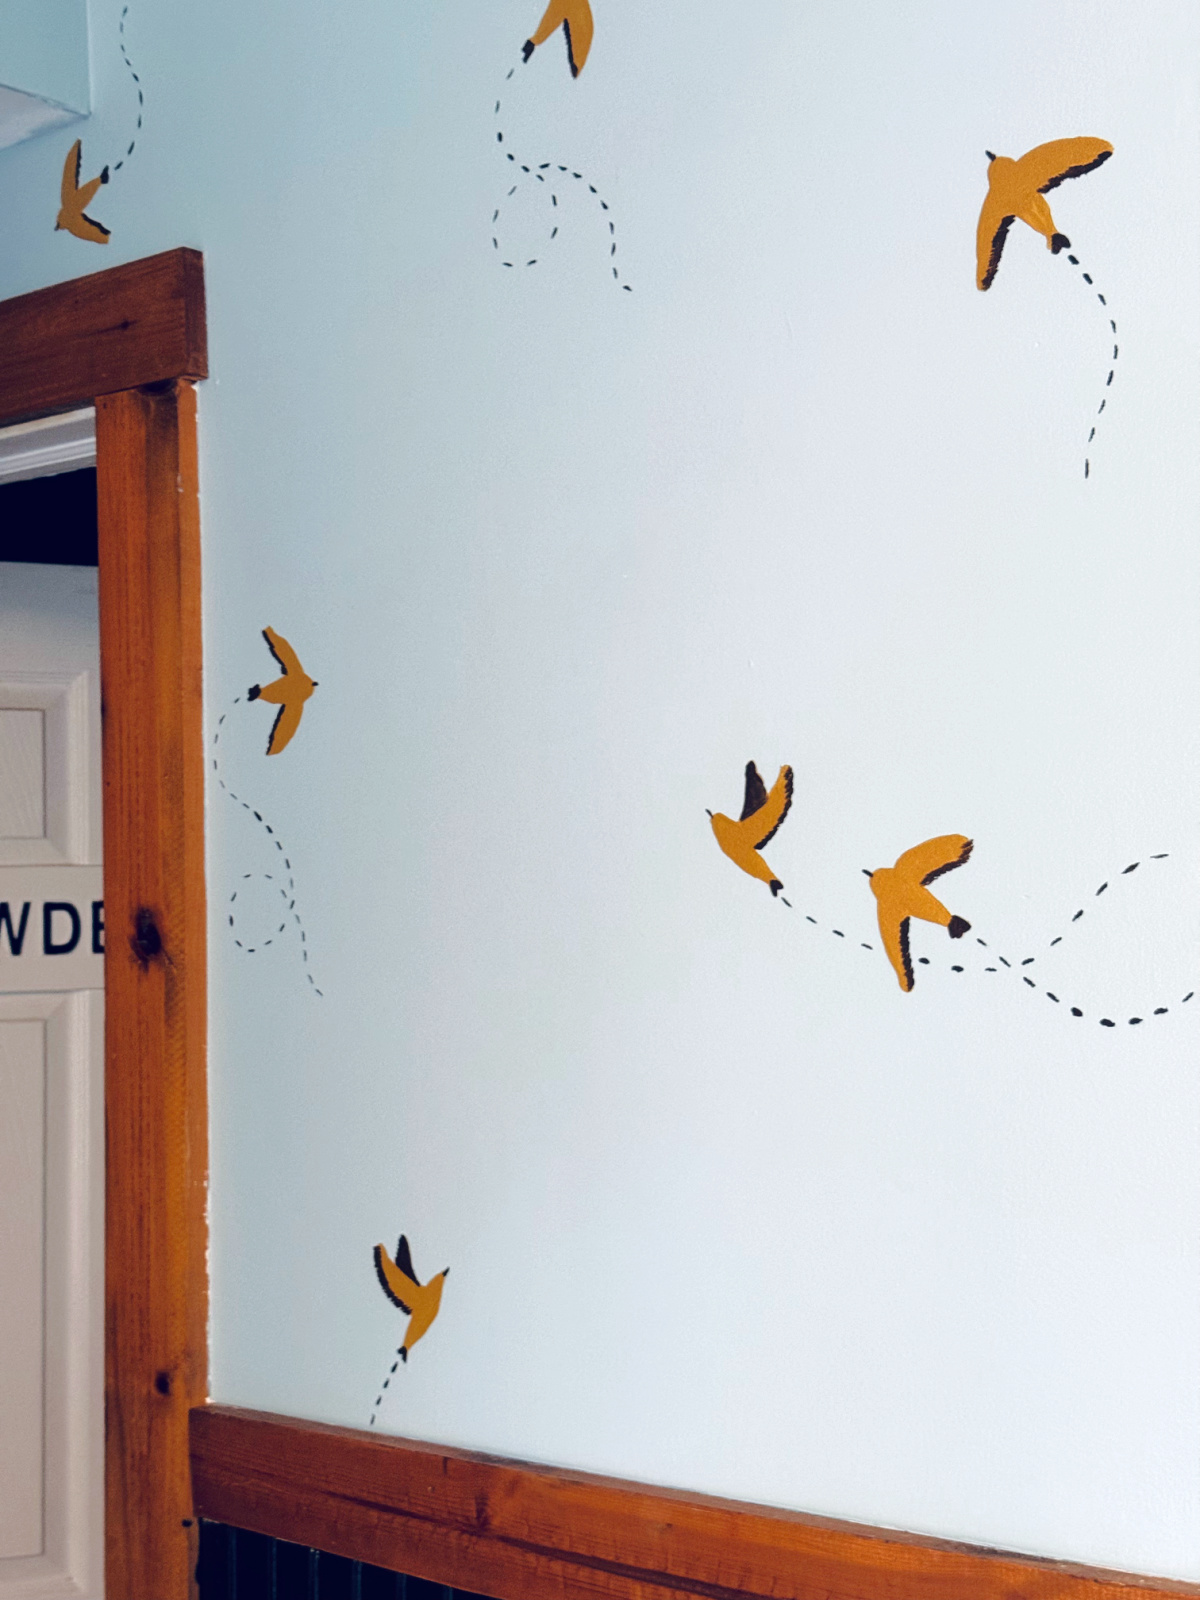
I also cannot handle too much visual clutter, so most wallpapers are too much for me. I left a lot of empty space in between birds. You are welcome to put them closer together, like in the original video, which is closer to the wallpaper.
Once the base coat is dry, use small pieces of painter’s tape to experiment with bird placement. It’s hard to undo once the birds are actually on the wall (ask me how I know).
In the inspiration wallpaper, there are two birds close together in the pattern. I loosely mimicked that, but with lots of additional spacing.
3. Lightly trace your birds on the wall.
You’re going to lightly trace the birds onto the wall. You can use whatever orientation you like, but make sure to vary the direction and orientation of the birds as you go.
The “trails” will be added afterwards, once you are able to step back and see the finished painted birds.
4. Choose two colors for your birds (one lighter base, one for wing shadows, noses and tails).
I started off with a lighter yellow for my base color. If I could do it over, I would go with a medium brown, maybe Gallant Gold (I might go back over the base later this year), instead of yellow. I landed on Sherwin Williams’ Bosc Pear for the base and Sherwin Williams’ Turkish Coffee for the tails.
You could also do a blue on dark blue/gray sparrow. See THIS version of the wallpaper for inspiration.
I got sample pots of paint, and could only get them in a satin sheen at our local Lowe’s, so that’s what I went with. I would have used eggshell sheen samples if I could have.
5. Paint the birds your base coat color.
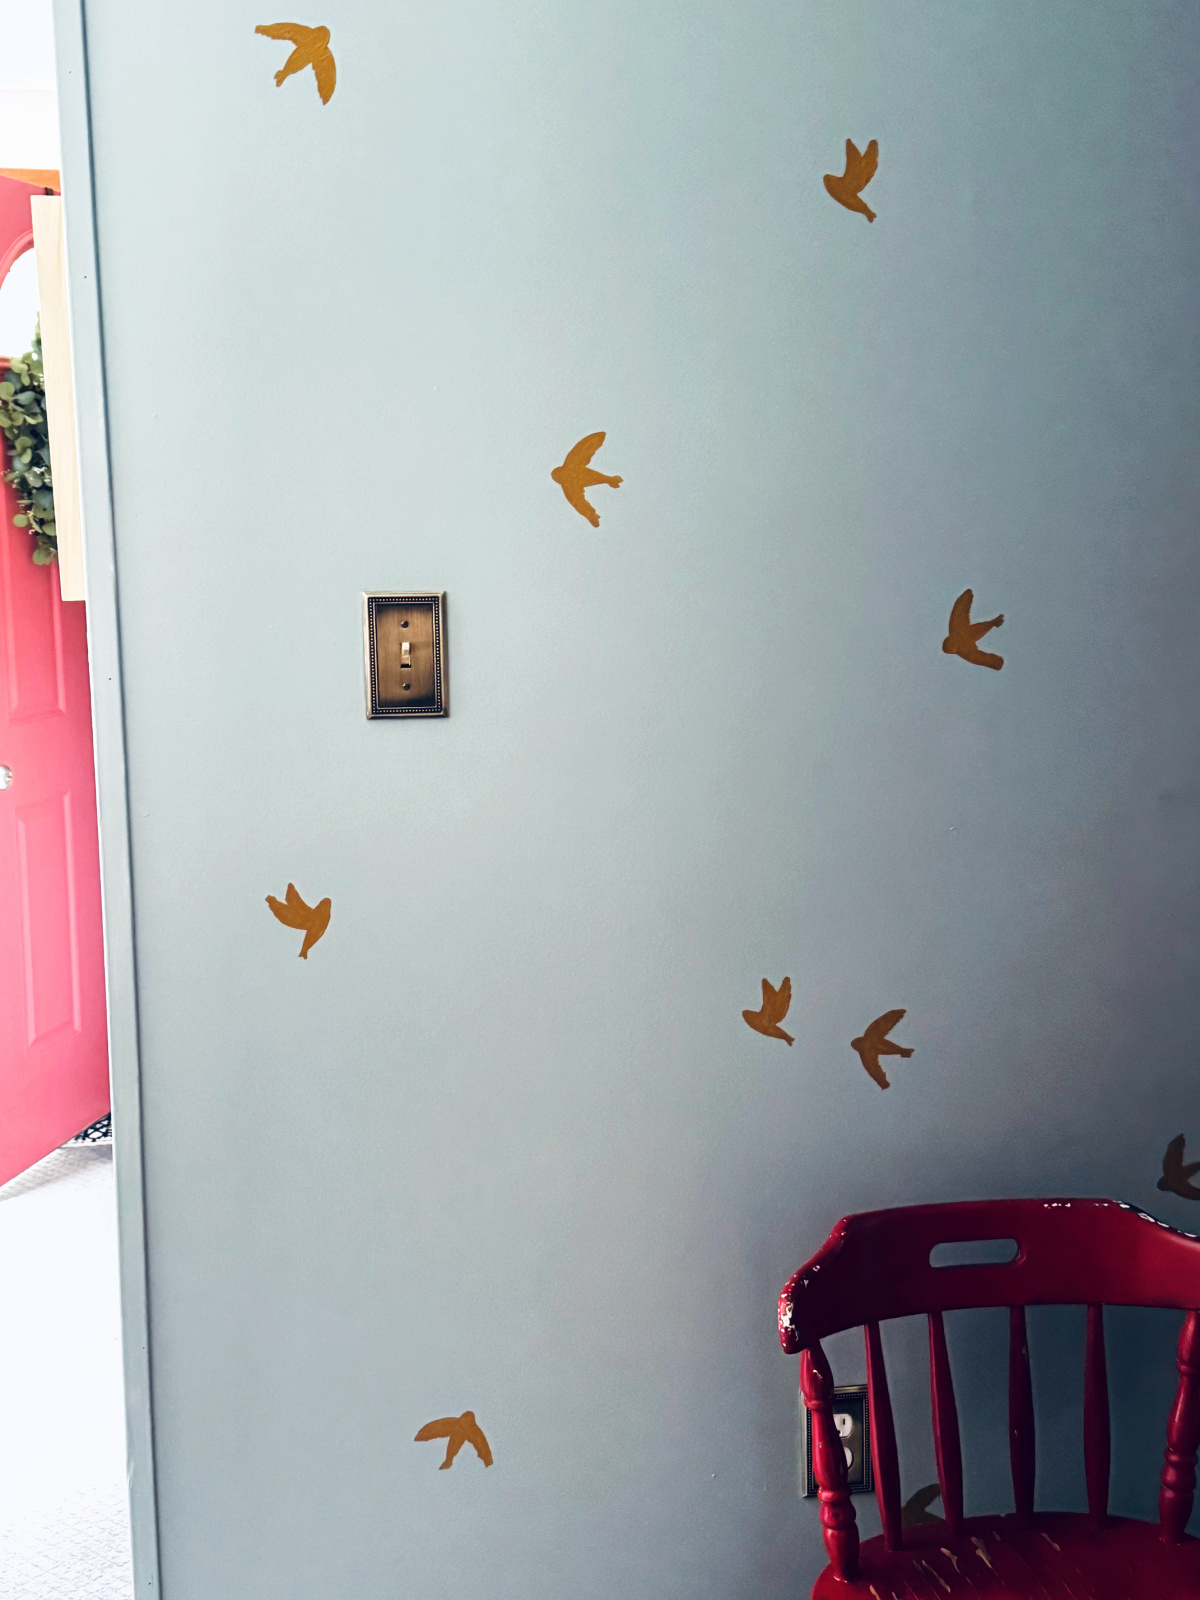
Fill in the whole outline with your base color. Make sure to cover the pencil lines as well, although you can go back and erase them later if you like.
You will probably need two coats.
6. Add the tails, noses and wing shadows in your darker color.
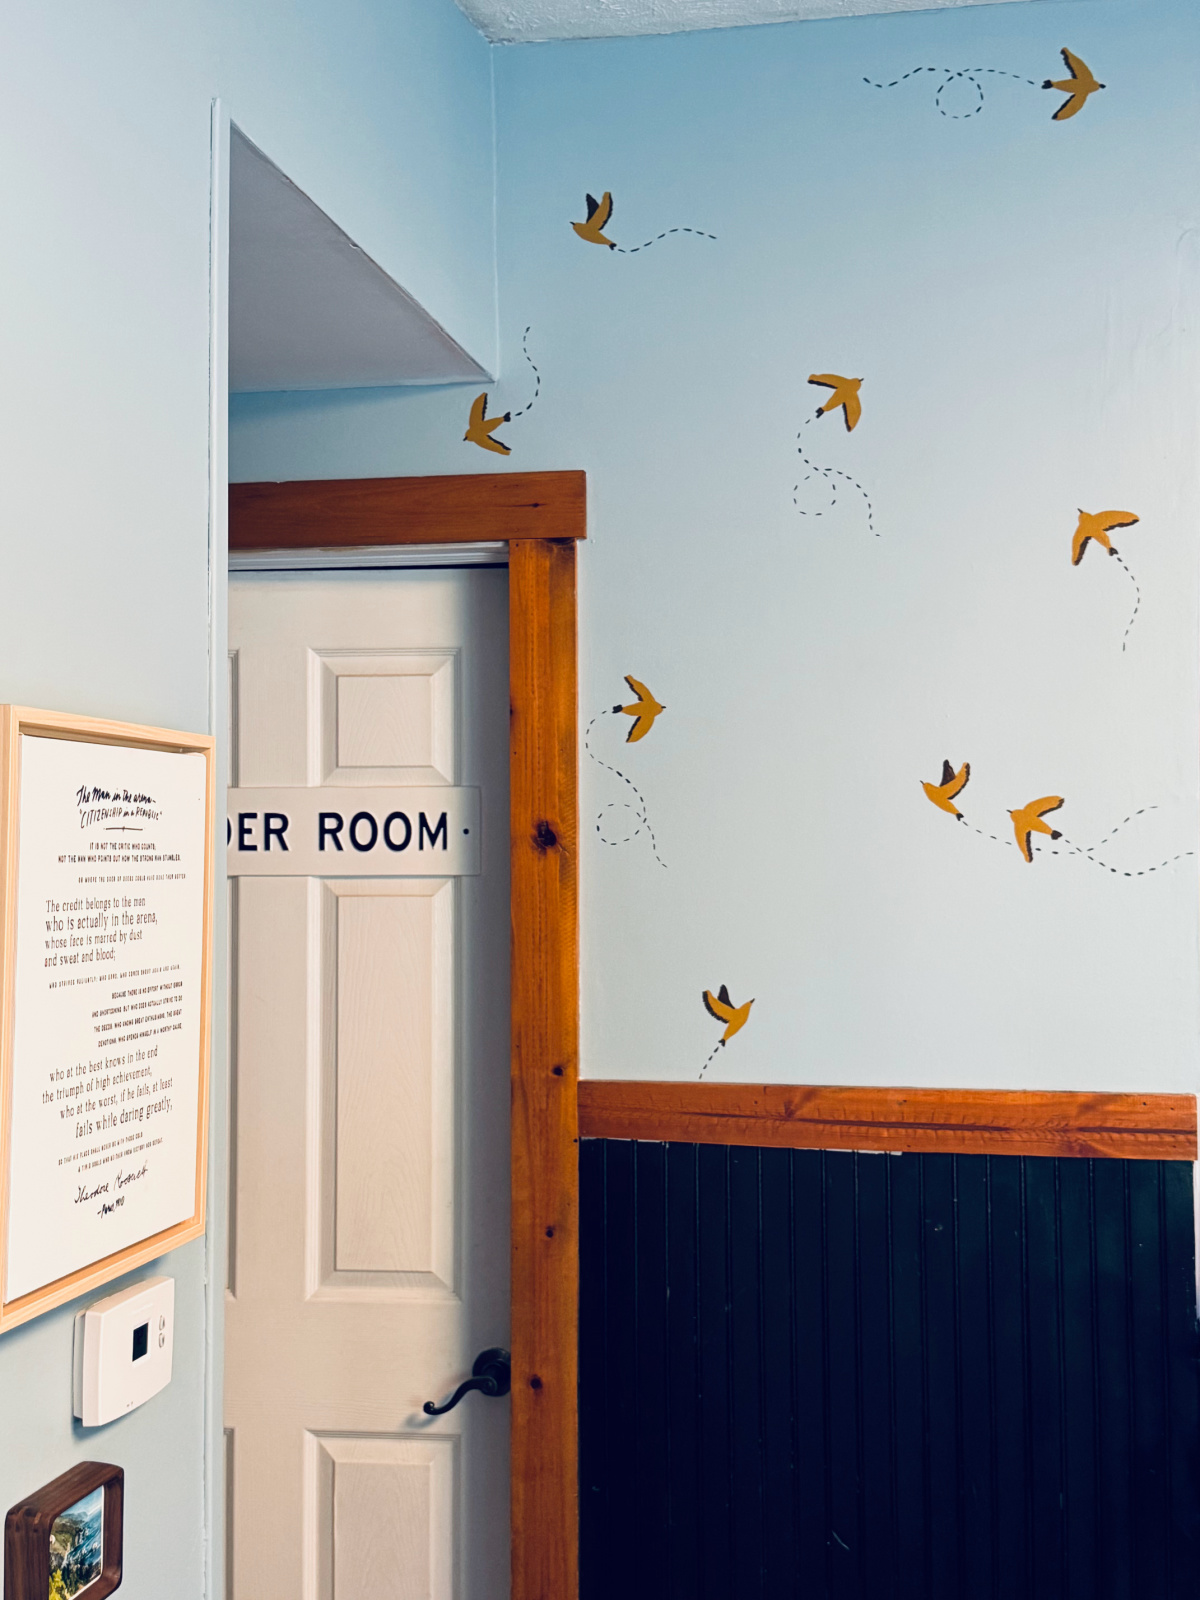
There is no “right” way to do this.
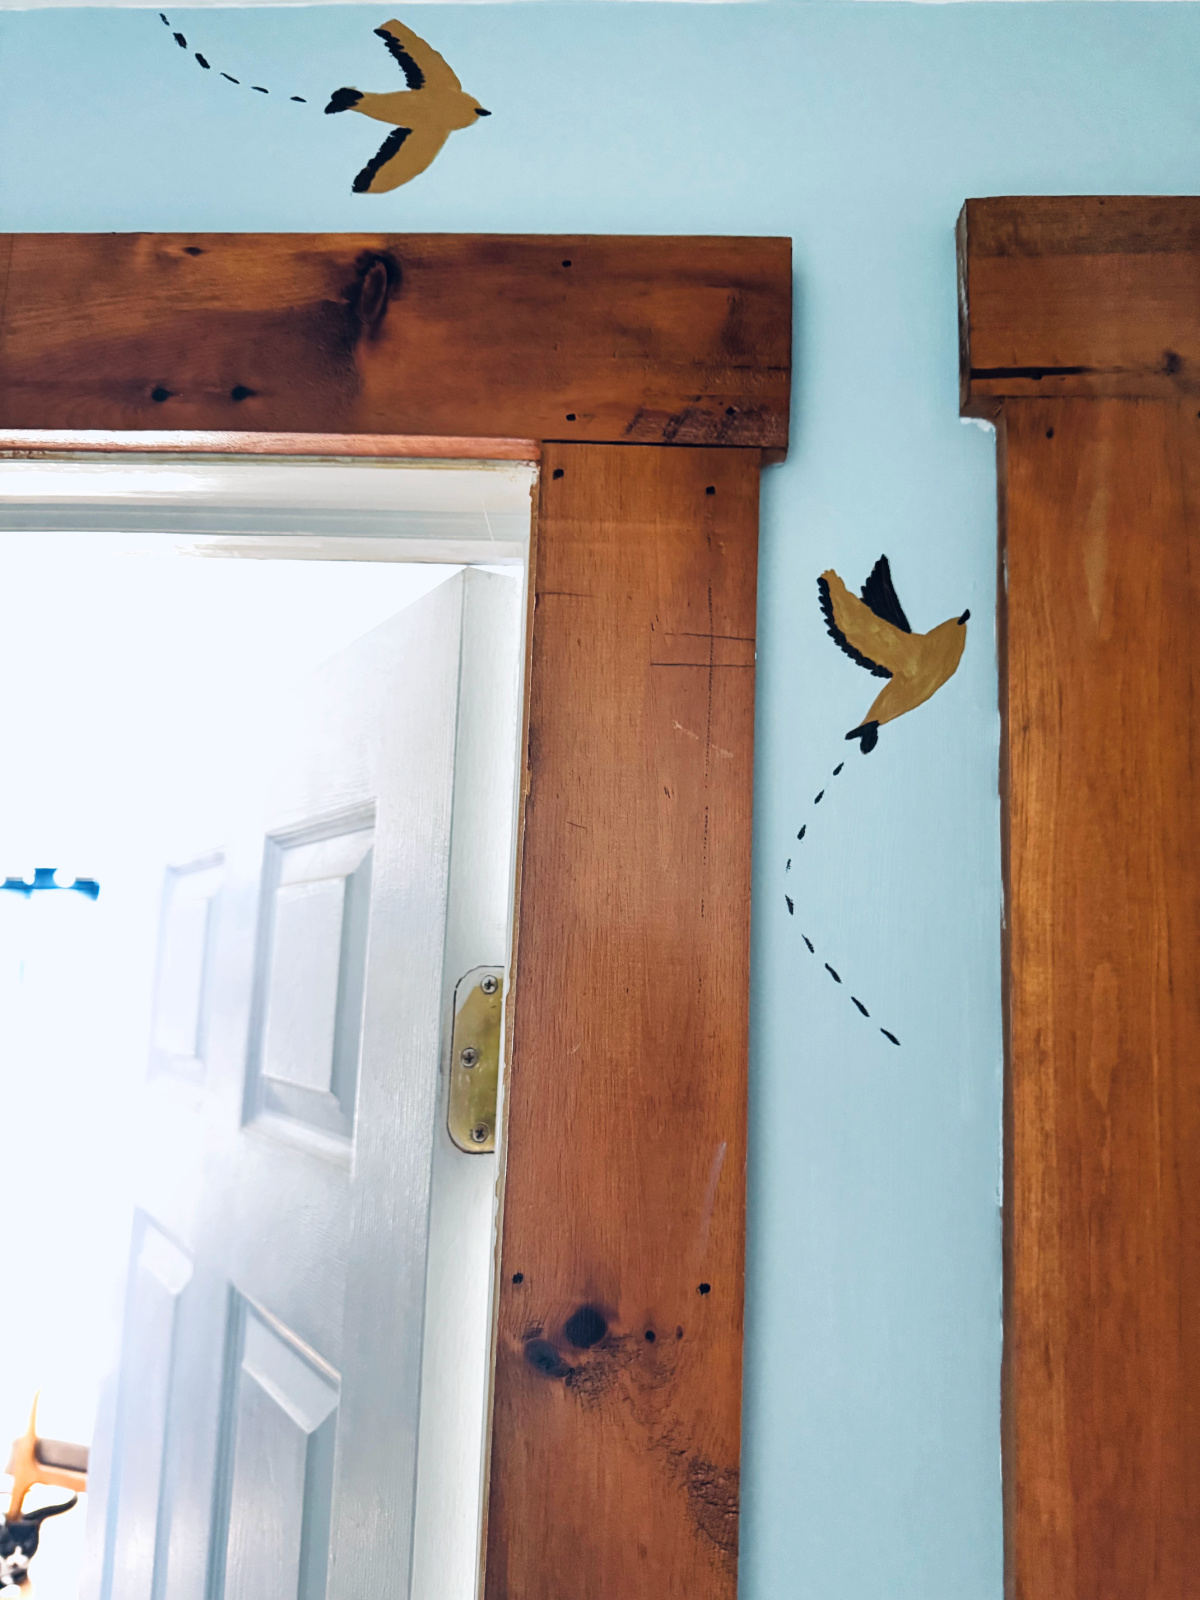
For the birds with their wings spread out, I “dabbed” the wing shadows in little bursts all the way along each wing for a feathered look.
For the birds with wings in the air close together, one whole wing is the darker color, and the other wing has a shadow.
Noses can be either thin rectangles or narrow triangles. Use your creative license!
7. Pencil in the trails. Once you’re happy with how they look, paint over the trails with your darker color.
I used about a 3:1 ratio of “non-loop” trails to looped trails. To clarify further, there are fewer looped trails.
This is the part where you wing it. I kept the non-looped trails to about 7-9 dashes. All of mine curve and/or arc.
With the pairs of birds, the trails often overlap. See photos for examples.
I used my thinnest paint brush for the trails. Go slow until you get the hang of it.
Enjoy Your Birds, and Don’t Forget to Grab Your FREE PDF
I hope this project goes as well for you as it did for me. Better luck on choosing your base color, of course. I’ll update this post if I somehow manage to change the base wall color.
If you click the image below you can download the free PDF with both styles of birds.
Print on sturdy cardstock if at all possible (you can use standard paper in a pinch), cut them out, and trace on the wall. It’s that simple.
Happy DIY decorating!
Read Next: Peel and Stick Tile Flooring Tips and Tricks for Beginners