Inside: A step by step DIY paper bag star tutorial with two different designs for cheap, beautiful decor. Hang for Christmas, the holidays, winter in general, or just because they’re pretty.
If you’ve been on my side of Instagram this holiday season, I know you’ve been seeing all the DIY decor this year.
Paper chains. Dried oranges. Stars of all kinds.
I tried the dried oranges, by the way. Hours and hours of drying and checking isn’t worth it in my book, and I didn’t really love the look. To each their own, I suppose.
But what really caught my eye were the paper bag stars. I’ve seen them in the past, but never followed through on actually making them. This year, I decided to give it a try.
Now I’m in love and want them all over my house for as long as winter lasts…which in Northeast Pennsylvania feels like forever.
I made them two different ways, with two different sizes/types of bags. Here’s the tutorial, and ways I made it easier to cut and hole punch these beauties.
DIY Paper Bag Star Tutorial
THIS POST PROBABLY CONTAINS AFFILIATE LINKS. AS AN AMAZON ASSOCIATE, I EARN FROM QUALIFYING PURCHASES. YOU CAN READ OUR FULL DISCLOSURE POLICY HERE.
There are tutorials all over Instagram, but to give credit where credit is due, THIS video was the one I used initially. Her first design didn’t turn out well for me, so I used the other two as my base.
However, I had to keep pausing the video to follow along, and it would annoyingly stop on the frame AFTER the one I needed. Back I went to try again…and again, and again and again. After enduring all of that, I decided the world needed (another) good old-fashioned non-video tutorial.
Also, cutting and hole punching through 7-9 paper bags was pure torture for my hands. I fixed it in my tutorial.
So if you’re a millennial (or any generation, really) who longs for old school photographs and written directions instead of a rapid fire 30-second video where you thought, “That’s so cool! I want to make it,” and then processed to press pause/back a hundred times in frustration, this is for you.
Related: 5 Steps to Decorate for a Minimalist Christmas
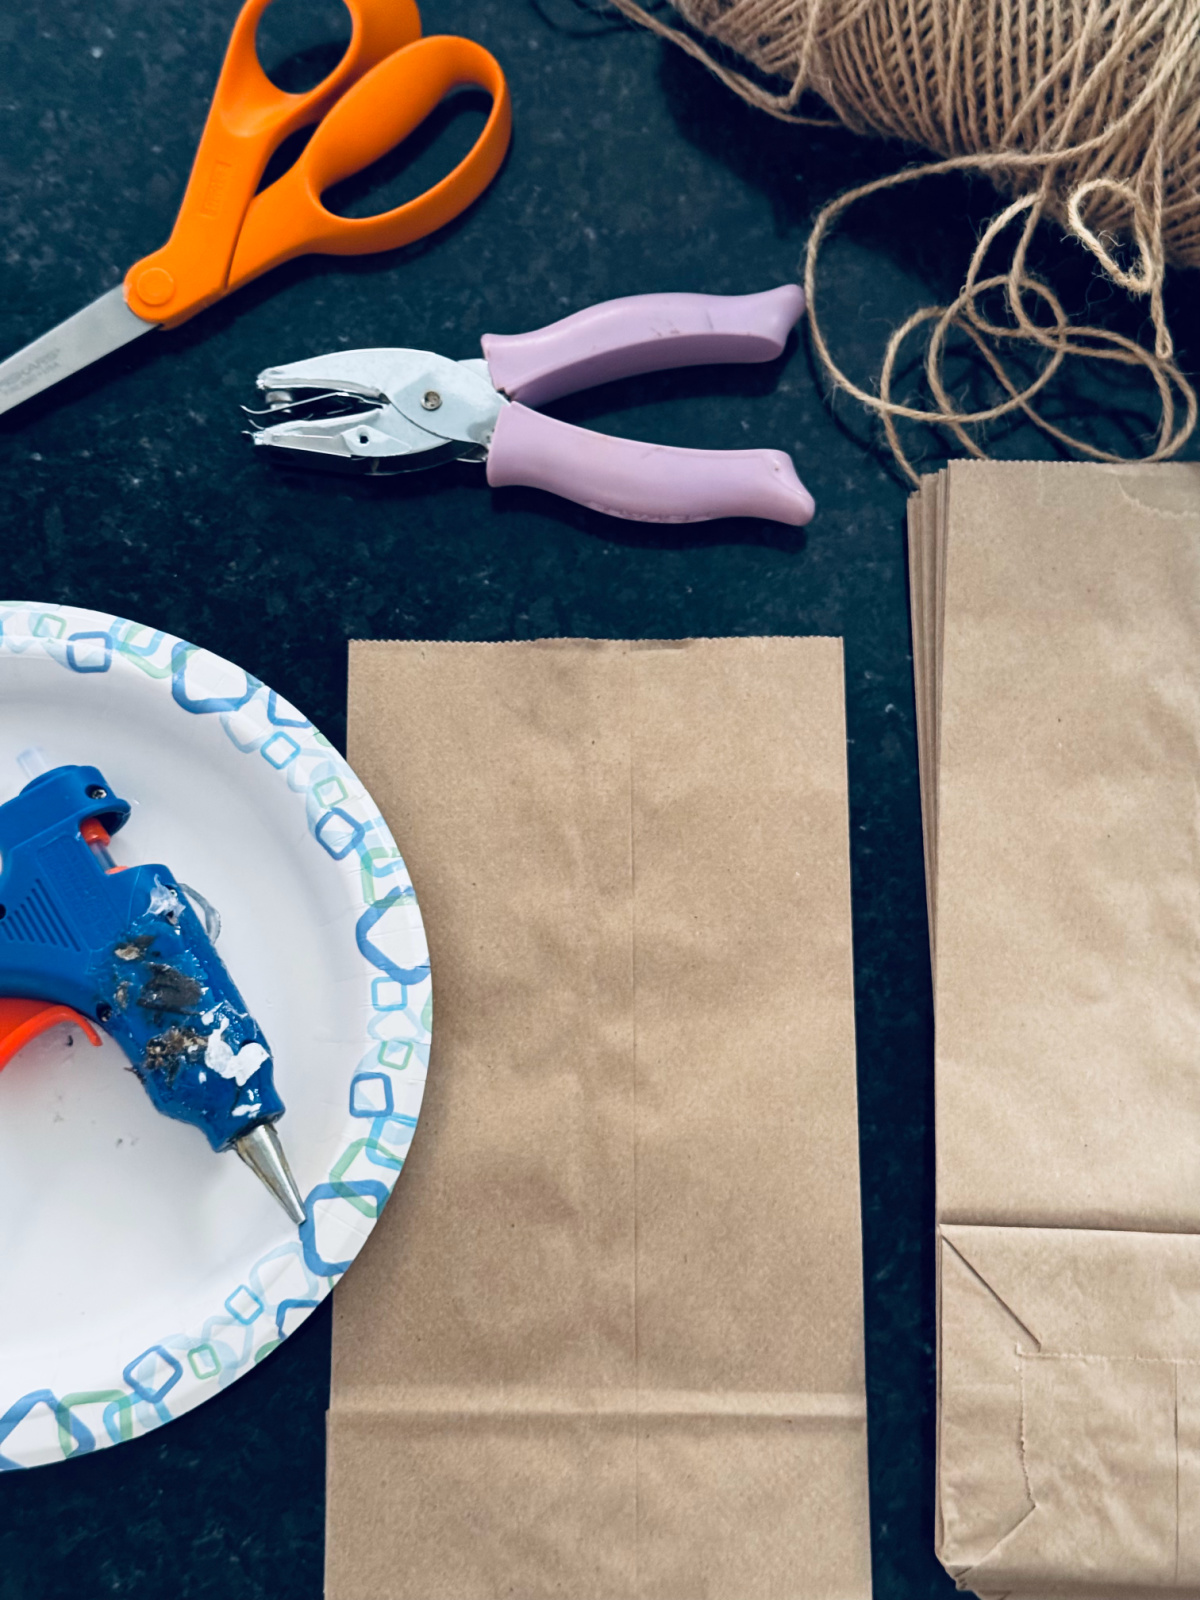
Supplies you will need…
- Paper Bags – standard brown or colored (I used THESE ones for the smaller stars)
- Scissors
- Glue Gun
- Single Hole Punch
- Twine or String
- Ruler
- Push Pins (to hang from the ceiling)
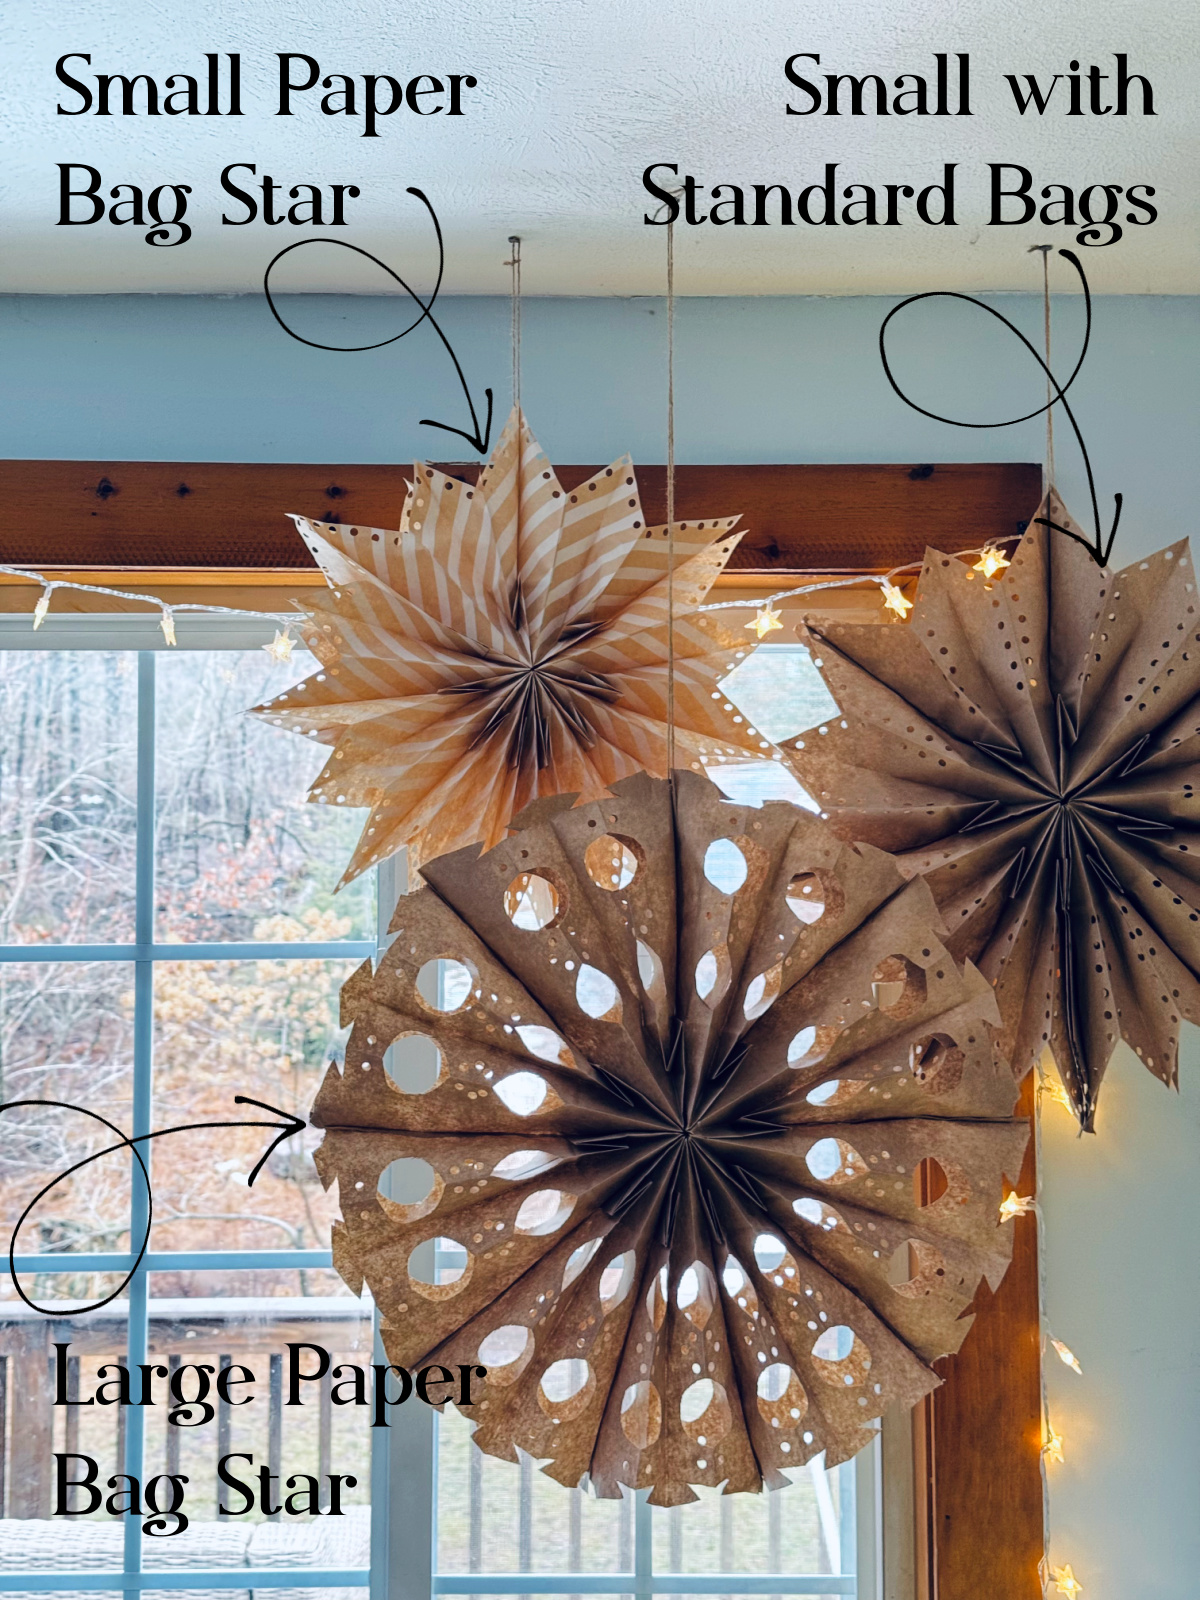
1. Choose 9 bags for standard size paper bags, or 7 if you’re using a shorter version.
My first attempts used standard brown paper lunch bags. Nine is the perfect number for this type of bag.
However, when I tried to use nine with THESE shorter, white and brown striped bags, nine was too many. The bottom half fell too much and cramped together.
Seven is the perfect number for shorter, colored paper bags.
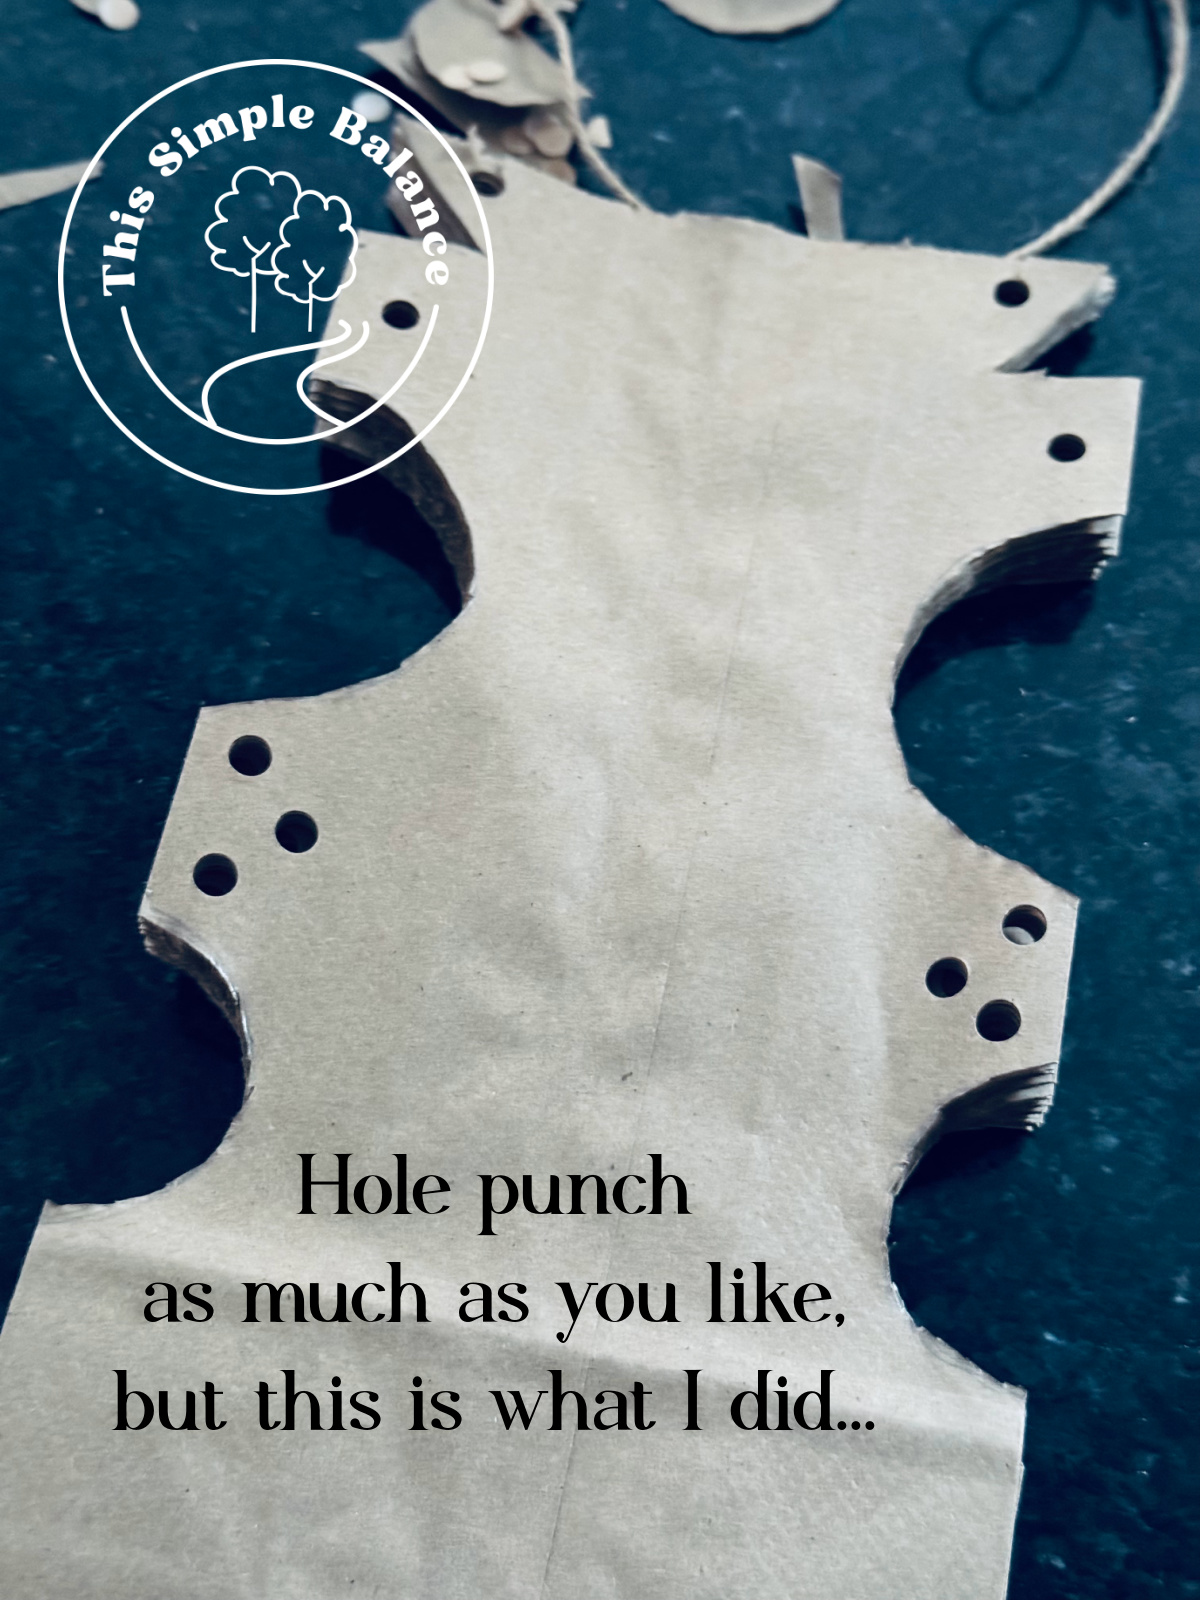
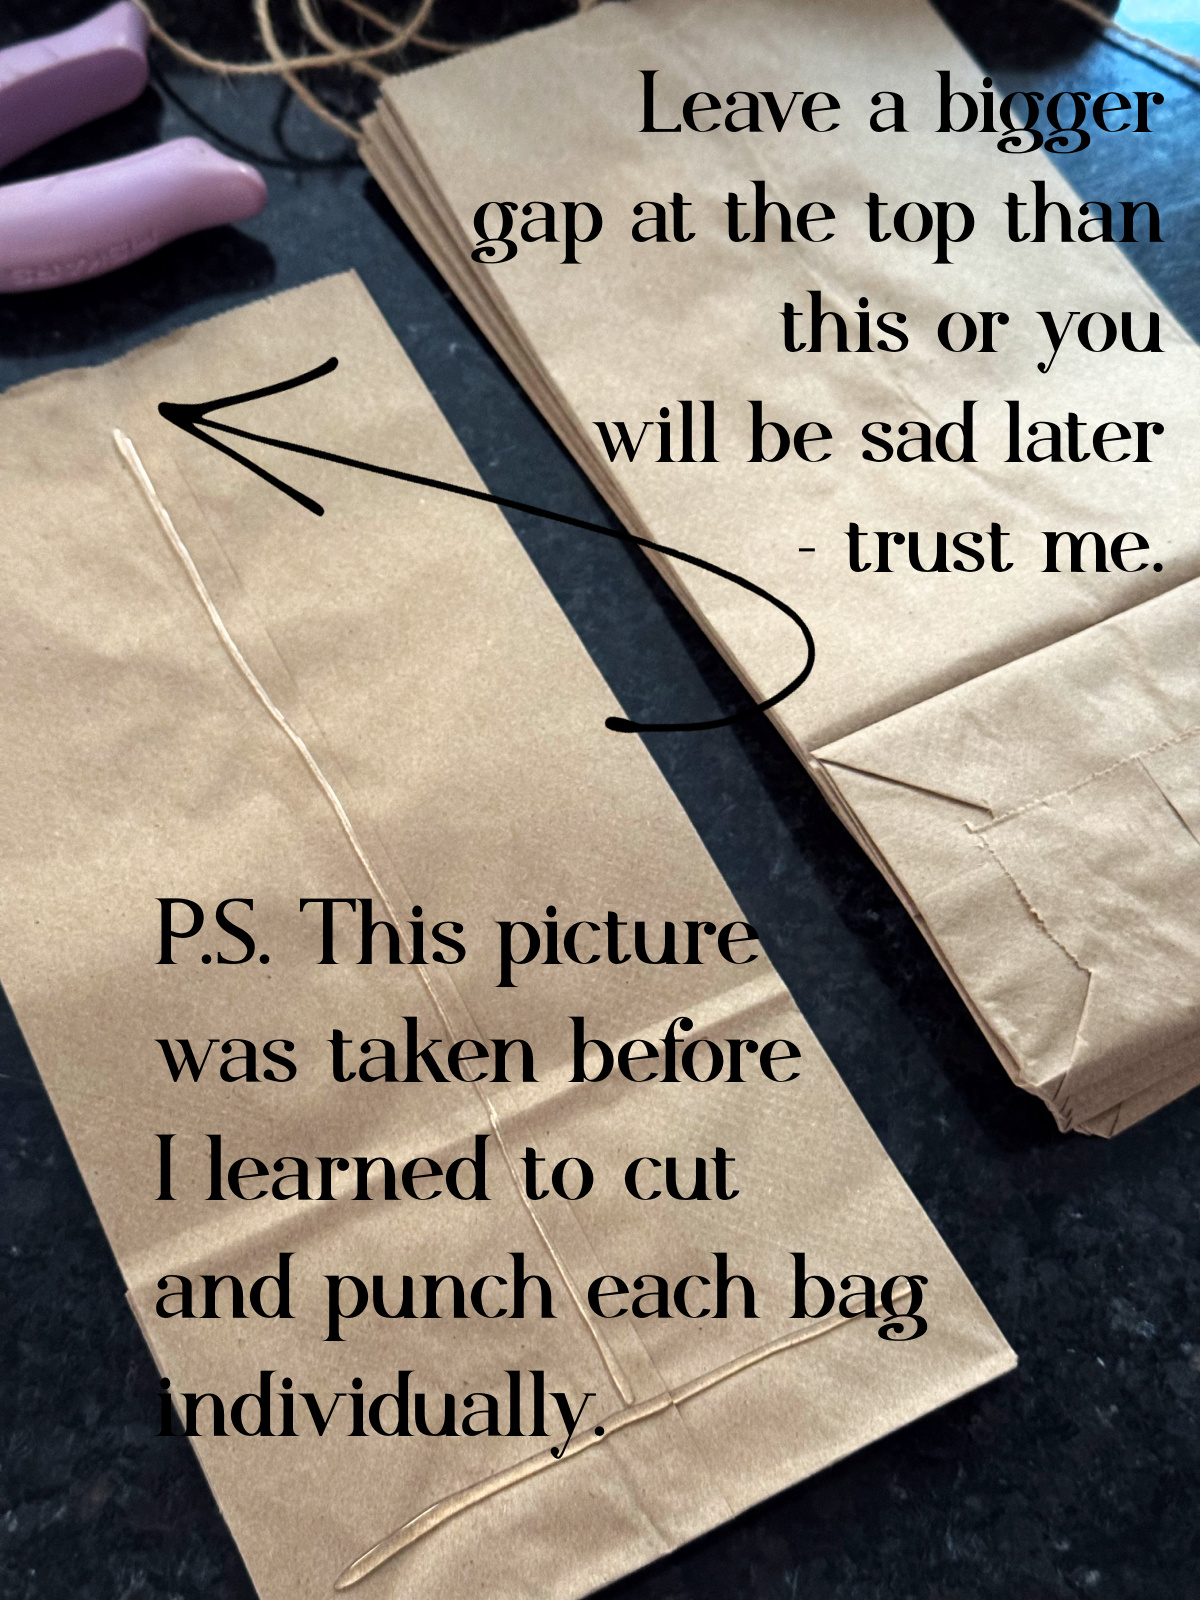
2. Cut and hole punch each individual bag FIRST (in the second large star below, I glued first – don’t do what I did, you’re welcome).
This is where I diverge from pretty much every tutorial. It is SO much easier to cut and hold punch your bags BEFORE you glue them together.
It does not matter if they line up. No one cares.
For the smaller stars using shorter brown paper bags with designs….
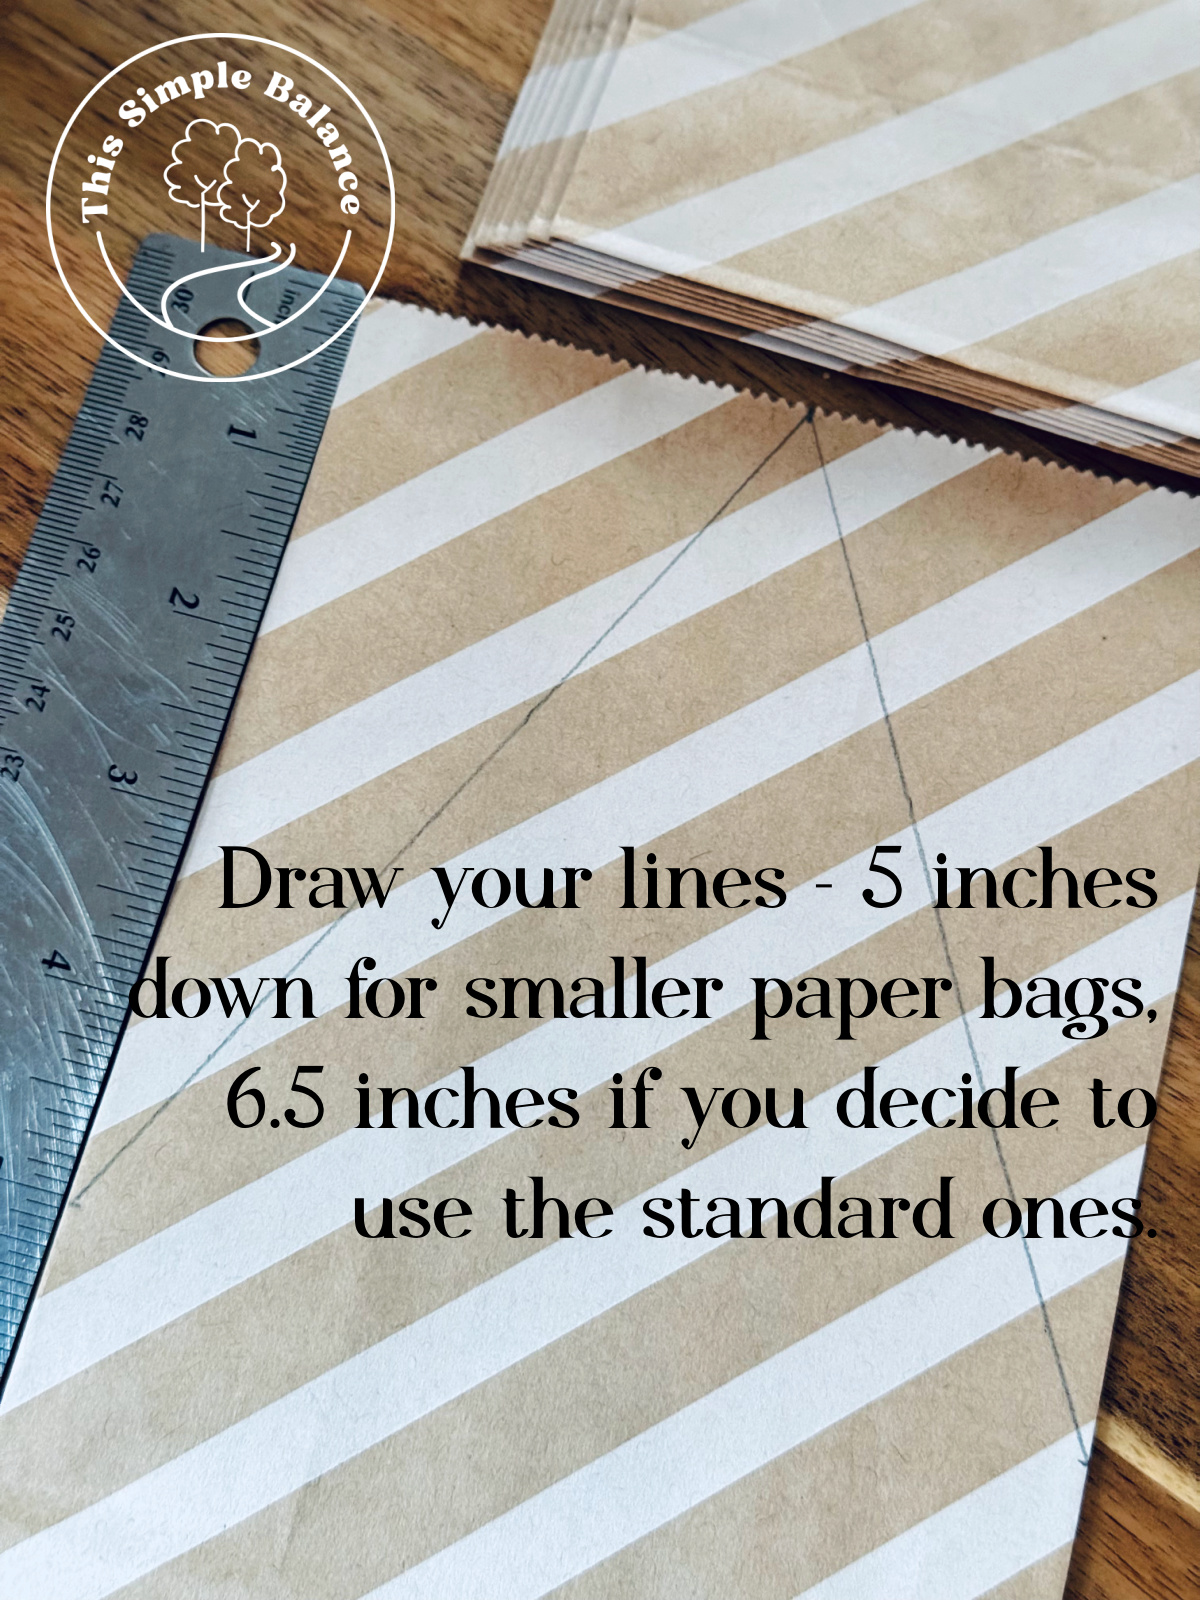
Mark five inches down from the top of the bag for shorter lunch bags, and six and a half inches for standard size brown paper bags.
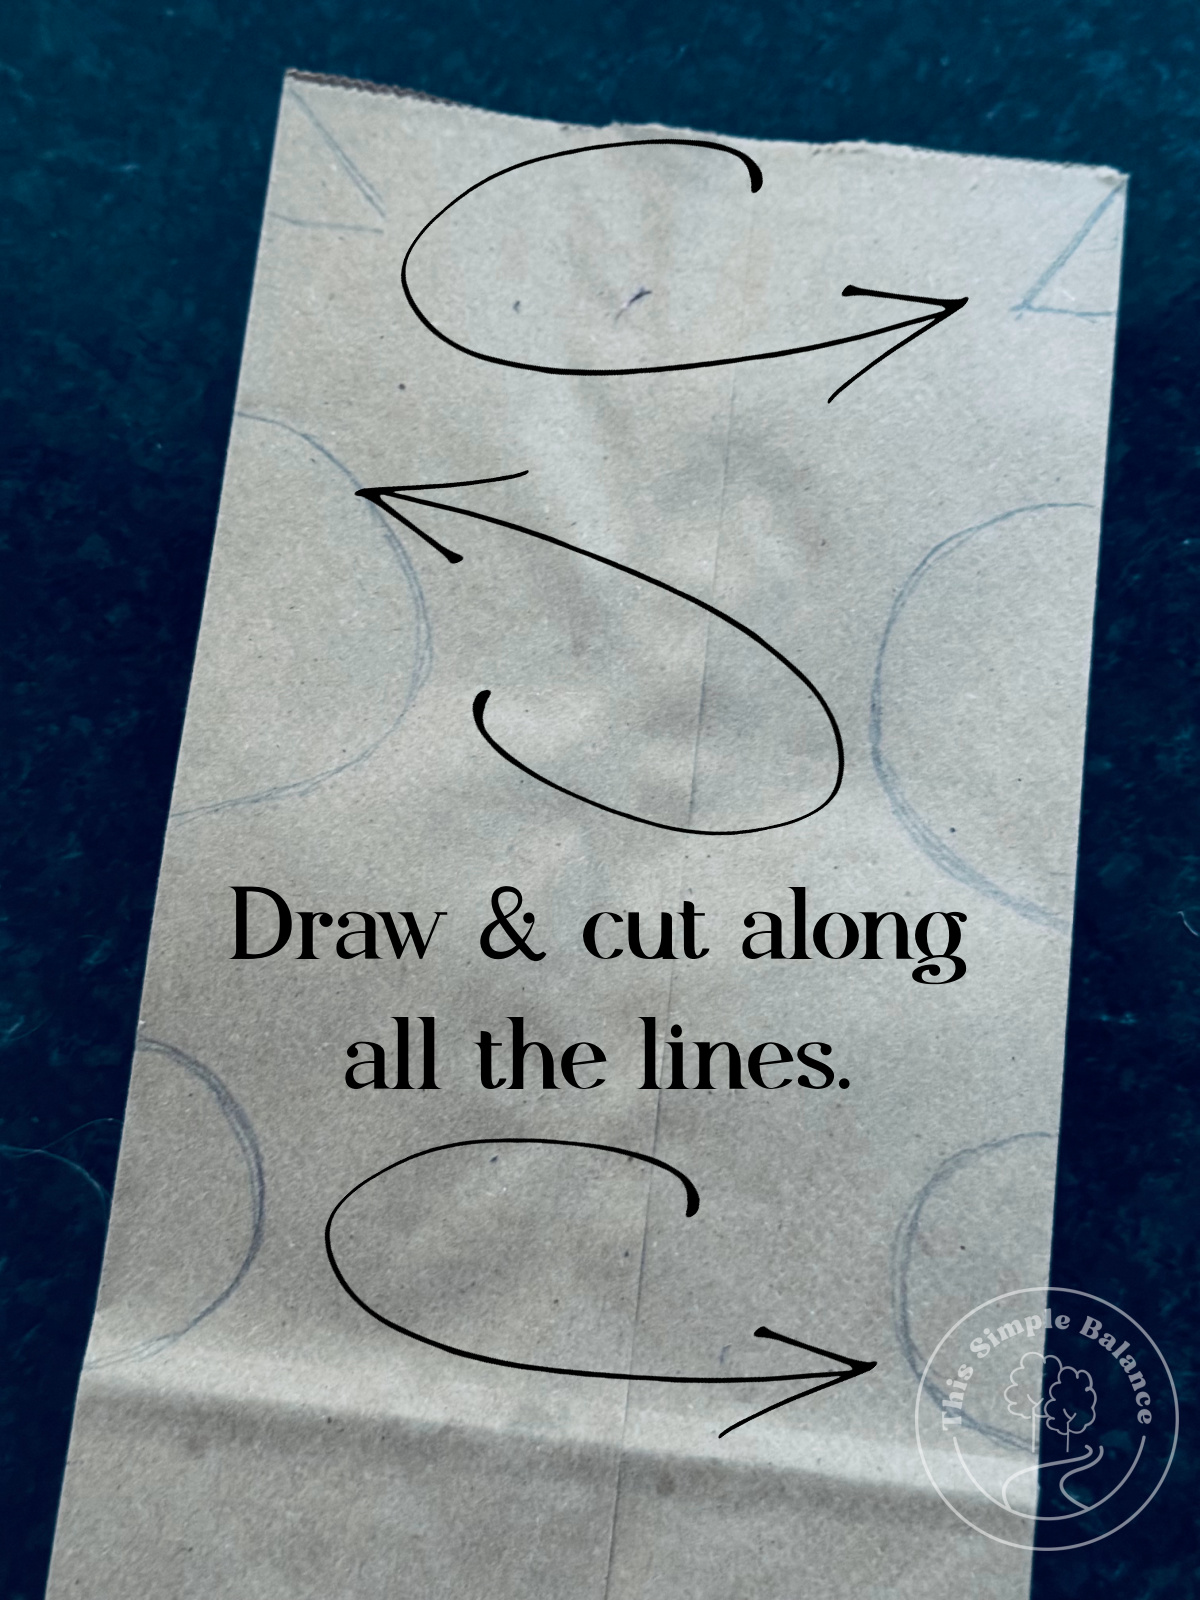
Mark the top of the bag halfway across the width. Using a rule, draw a straight line from the side mark to the top on either side (see picture).
Cut along the line on both sides to form a triangle point.
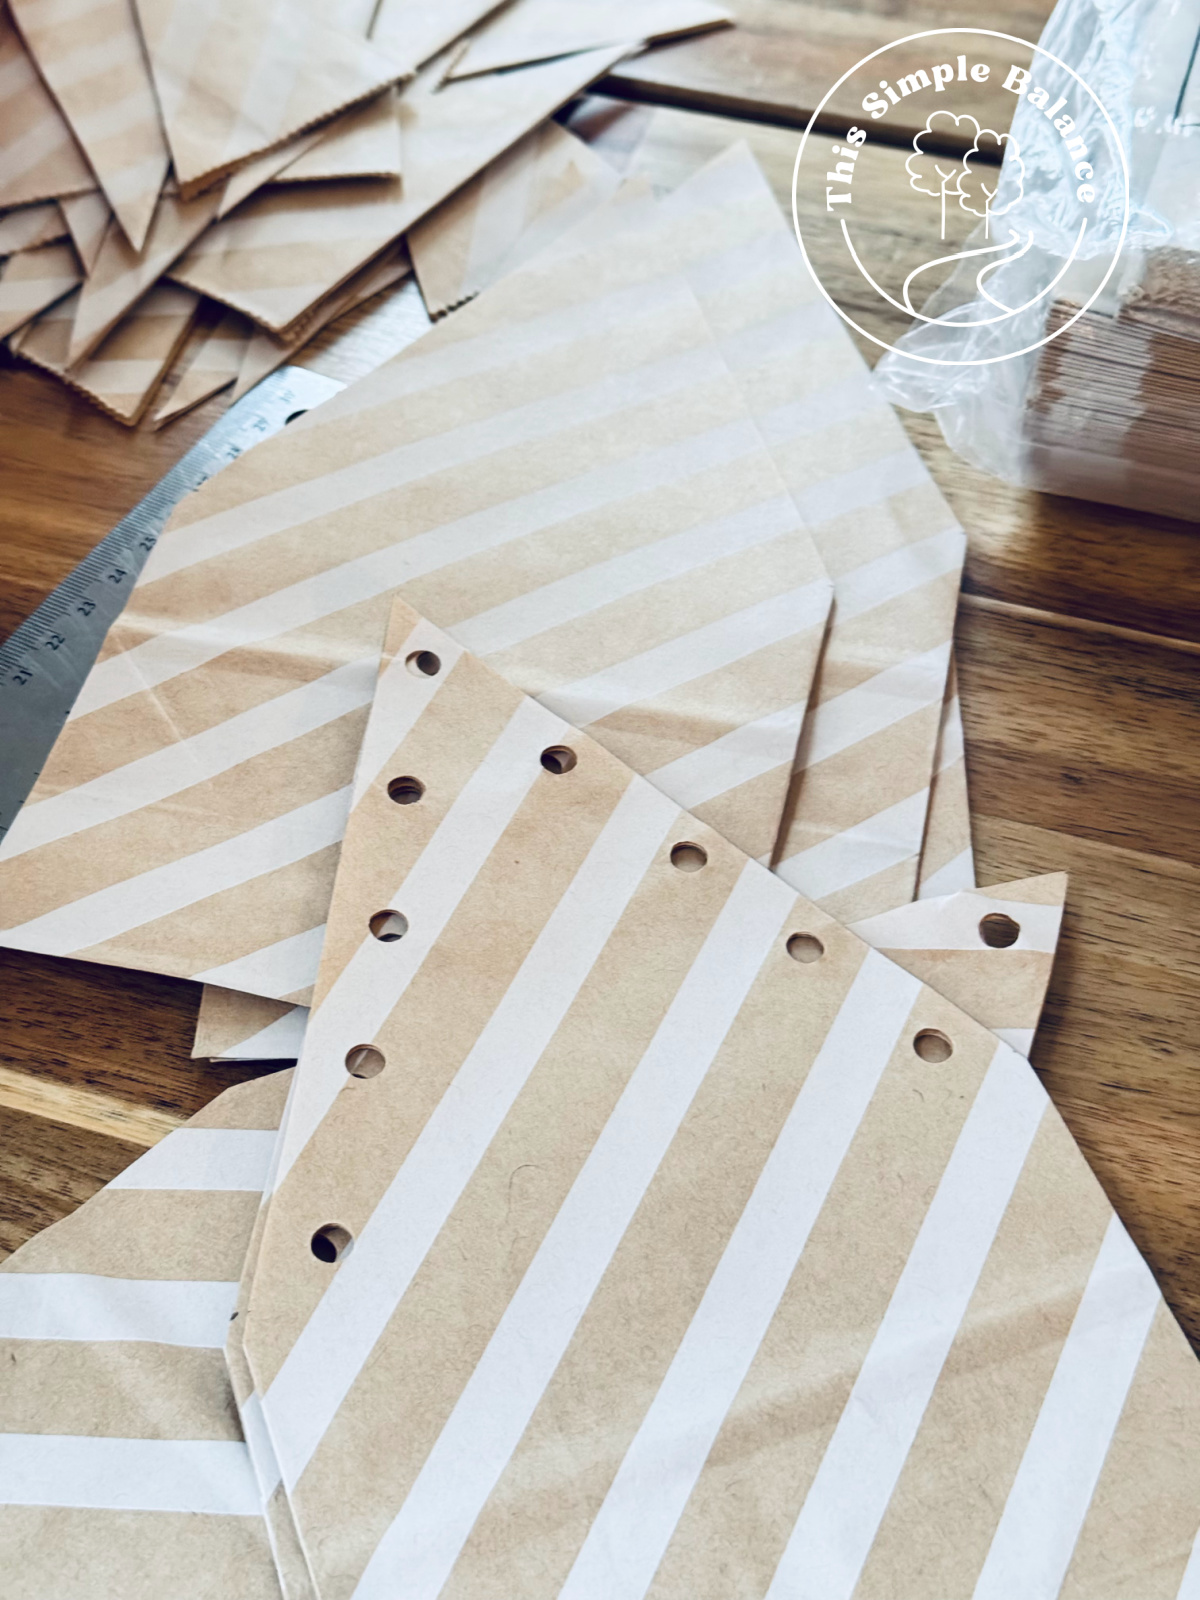
Hole punch a single hole at the top of the triangle. Then, hole punch along both cut sides, with as many holes as you like.
I did 6-7 the first time and then four the second because I got tired of hole punching. Now I prefer four per side.
For the larger stars using standard sized brown paper bags…
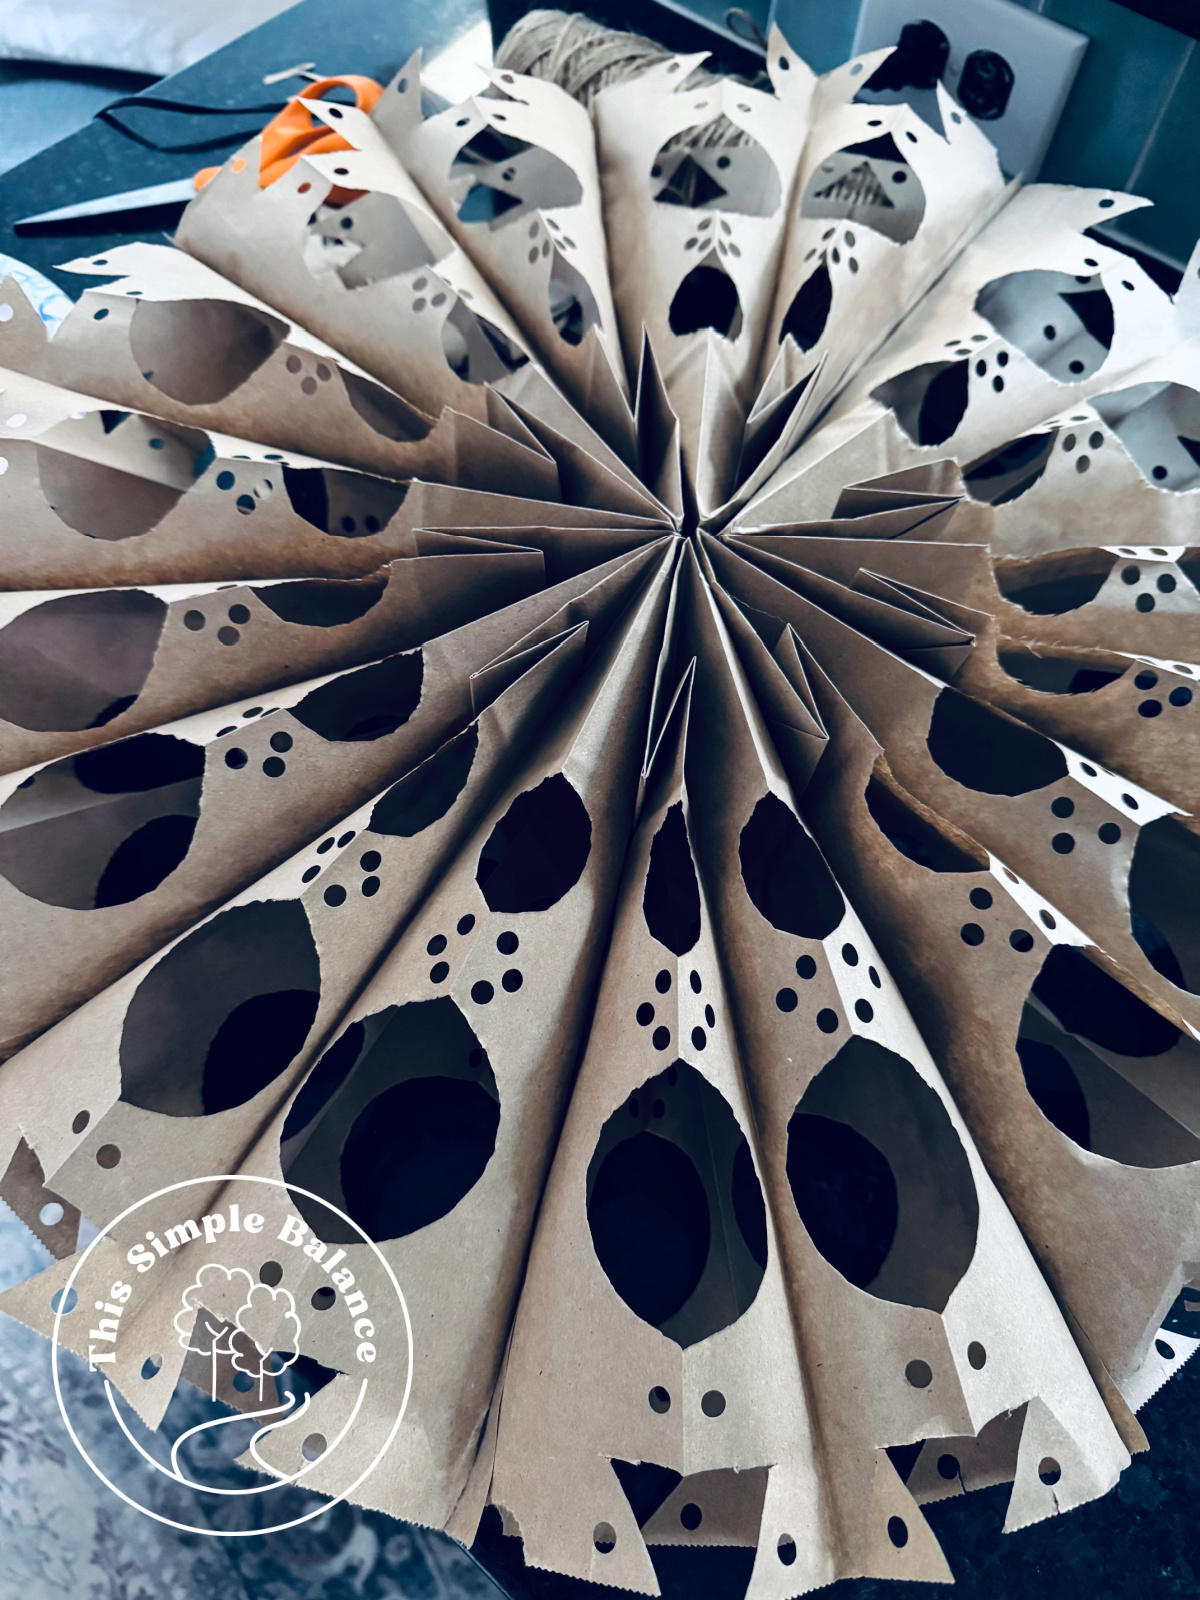
Starting at the top of the paper bag (by the opening), cut out a small right triangle on both sides of the bag.
Then, leaving an inch or two gap, draw two semi circles with space between them. Cut out the semi-circles.
Punch holes along the sides as desired. I punched on hole at the top, one in the rectangle above the semi-circles, and three in a triangular shape in the rectangle between the semi-circles.
3. Glue all of your bags together with an upside down T line of hot glue, starting with the first bag’s bottom crease face DOWN.
Starting about an inch below the top of the bag, draw a vertical line of hot glue down the middle of the bag to the bottom. Then draw a horizontal line of hot glue along the bottom of the bag.
Immediately line up and press your next bag onto the glue, bottom crease FACE DOWN. Continue with your remaining bags until you have a complete stack of glued paper bags.
4. Pull both sides of the bag stack around in a circle, and hot glue the remaining sides together using the same upside down T-shaped lines.
You might need to gently separate and loosen the inner bags along the way. This is where starting the vertical line of hot glue at least an inch away from the top is crucial!
Put your hands on the inside of the last bag on either side in order to press firmly so the hot glue holds.
5. Add an additional single hole punch if needed to thread the twine. Cut the length of twine desired, and use push pins to hang from the ceiling.
For the smaller stars, they already have a single hold punch at the top of each point, so you won’t need the additional hole, but I did need to add a single additional hole at the top for the larger stars.
You can either 1) tie the twine at the base of star and have only one piece of twine going from star to ceiling or 2) thread through the hole and tie at the top where you plan to secure it to the ceiling, which will mean you’ll have two lines of twine going from star to ceiling.
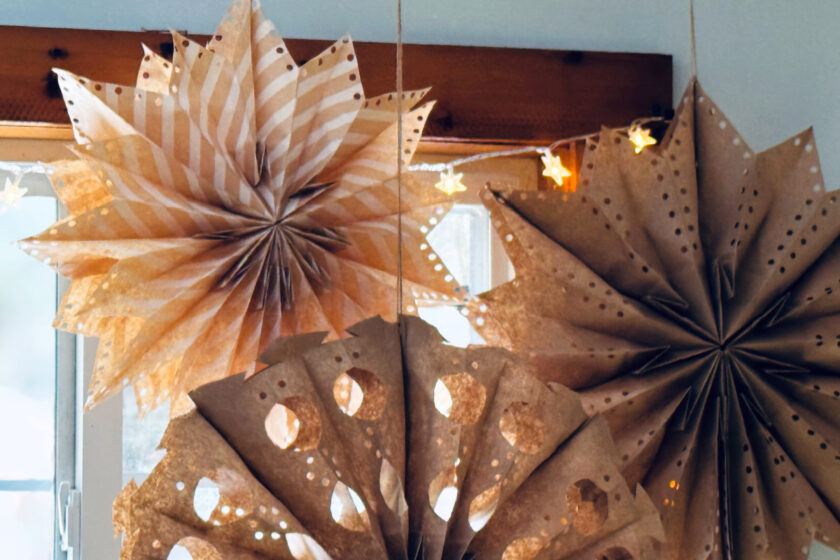
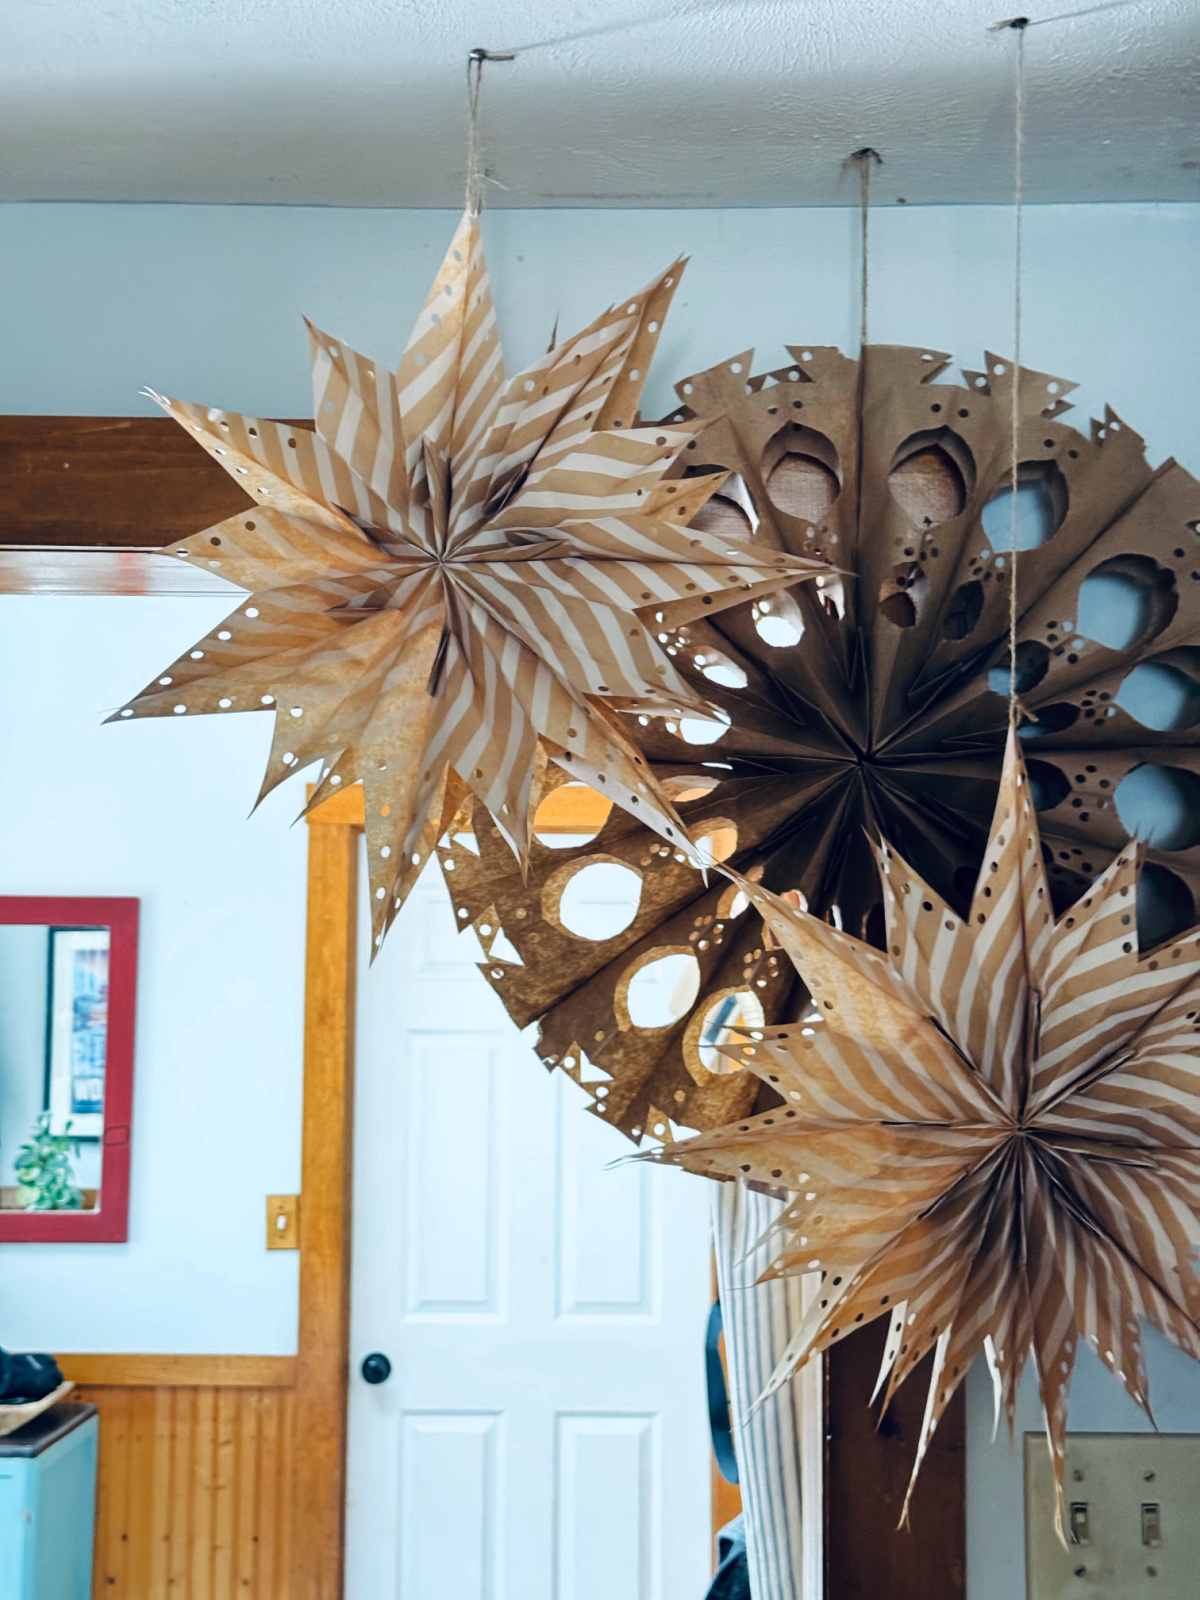
Create Groups of Three Paper Bag Stars and Add Twinkle Lights for Maximum Effect
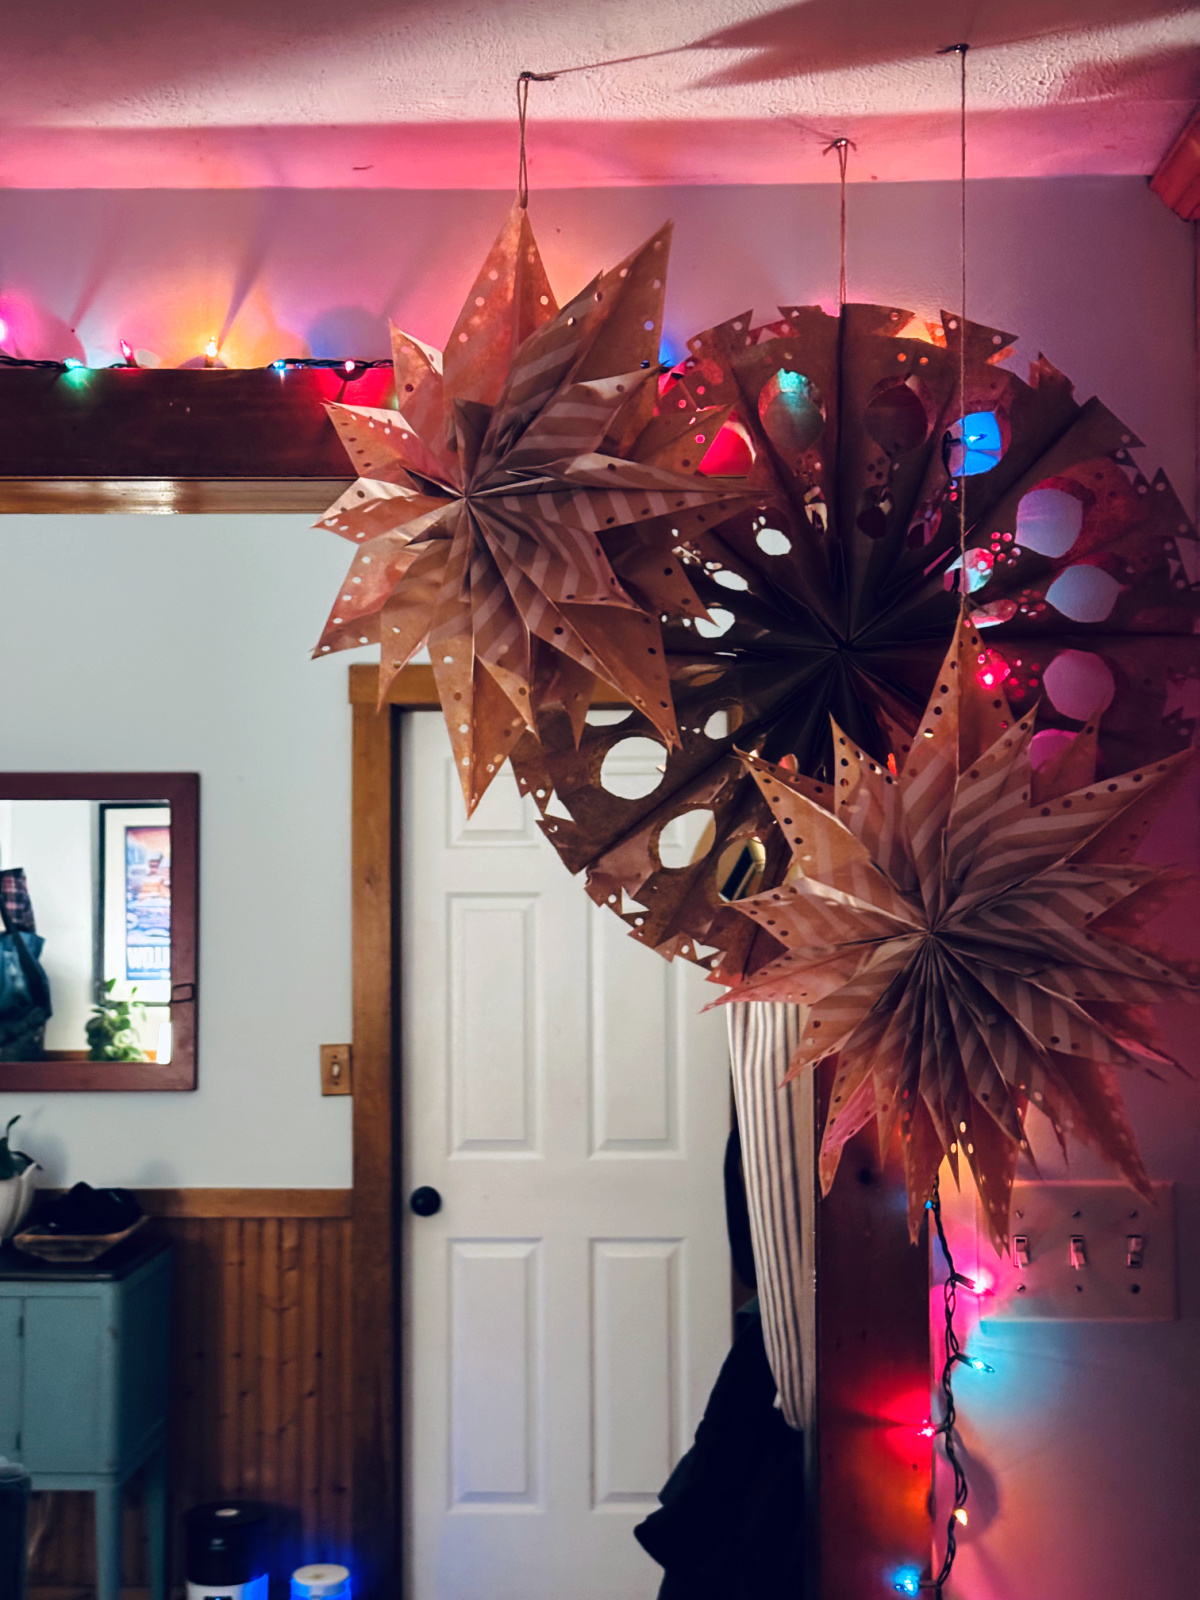
Stagger the stars in height and depth to get the effect in my photographs.
Again, for the smaller stars, I usedTHESE paper bags with white stripes, but I was very tempted byTHESE polka dot ones.
For the larger stars, you can pick up a pack of 35 brown paper bags for under $2 at your local grocery store.
Put THESE star twinkle lights or colored lights behind them to make them look truly magical. I love these stars so much, and they will make getting through winter so.much.easier.
Happy crafting!
Read Next: Peel and Stick Tile Flooring Tips & Tricks for Beginners
